
Installing door speakers and sound deadening and more
#31
 12-23-2010, 11:39 PM


Join Date: Dec 2009
Location: Quad Cities, IL
Posts: 3,279
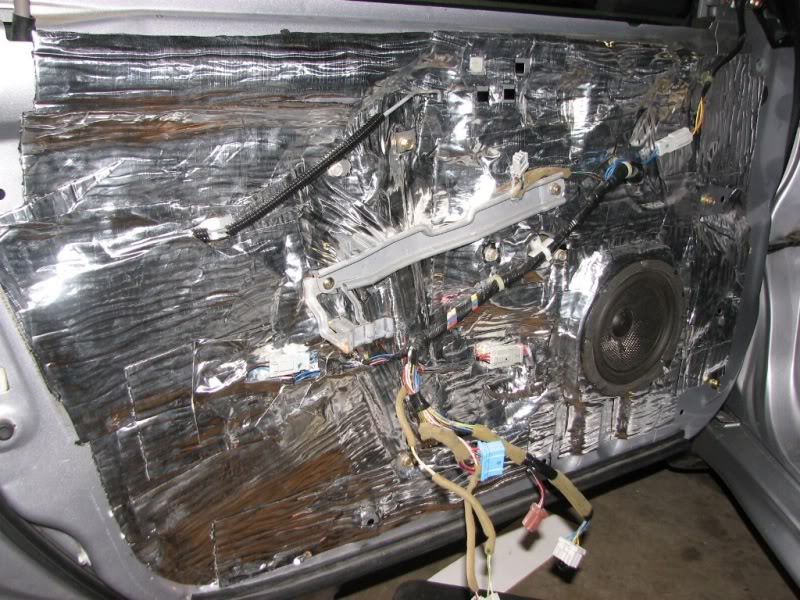
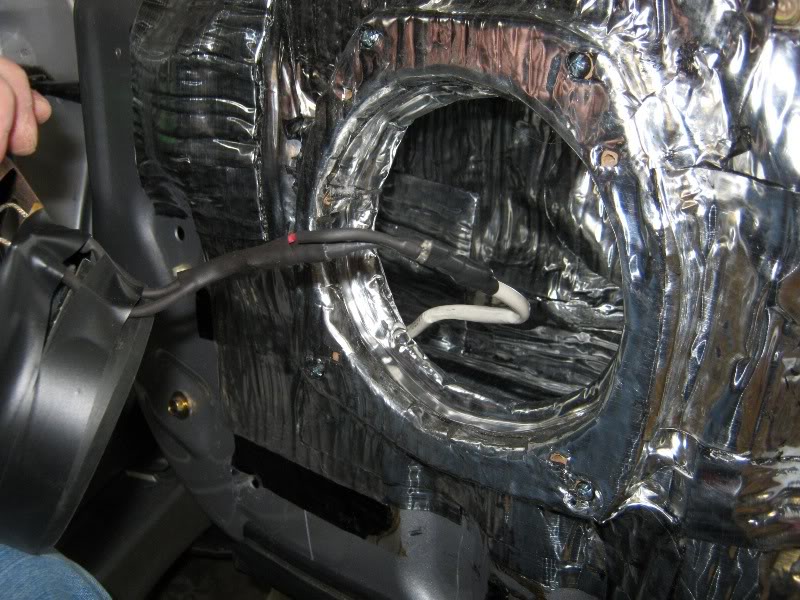
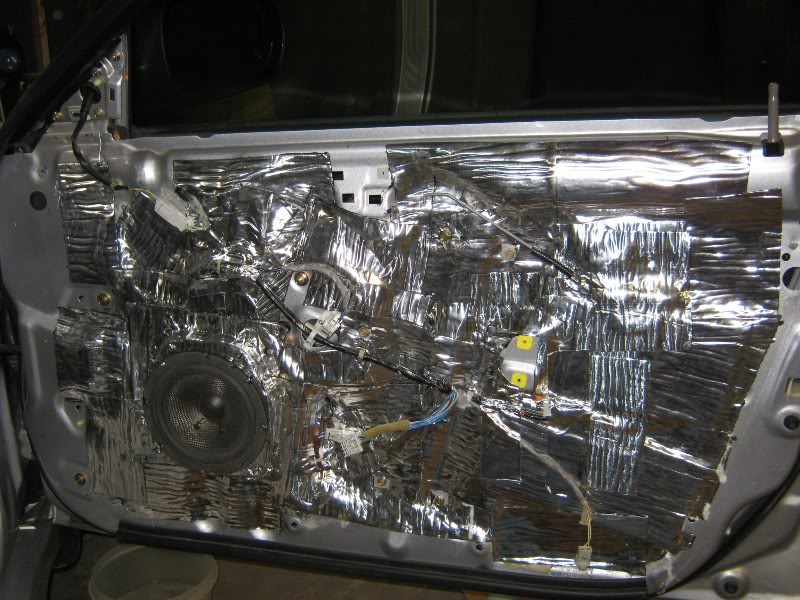
now you can connect the wires and mount the driver. wiring details will follow later, i reused my old connections for now. complete re-wiring of the doors will happen soon.

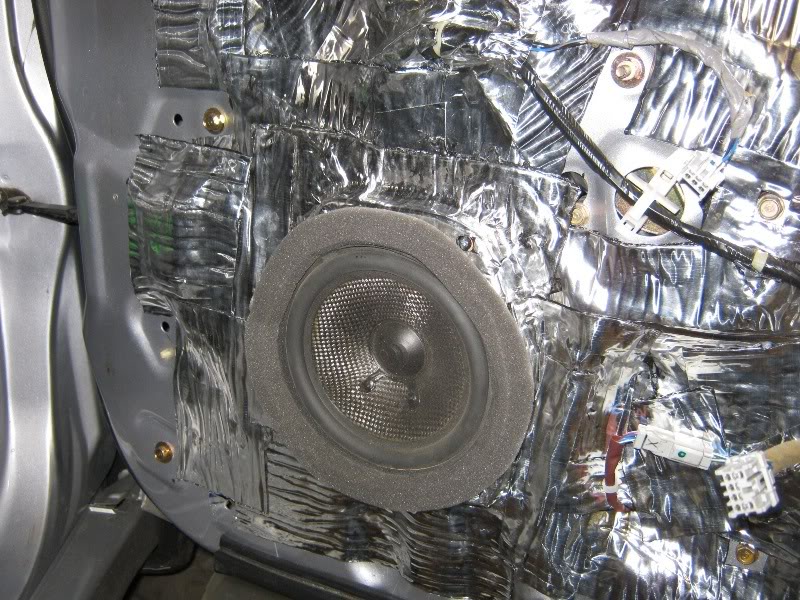
finished door is sealed and ready to rock
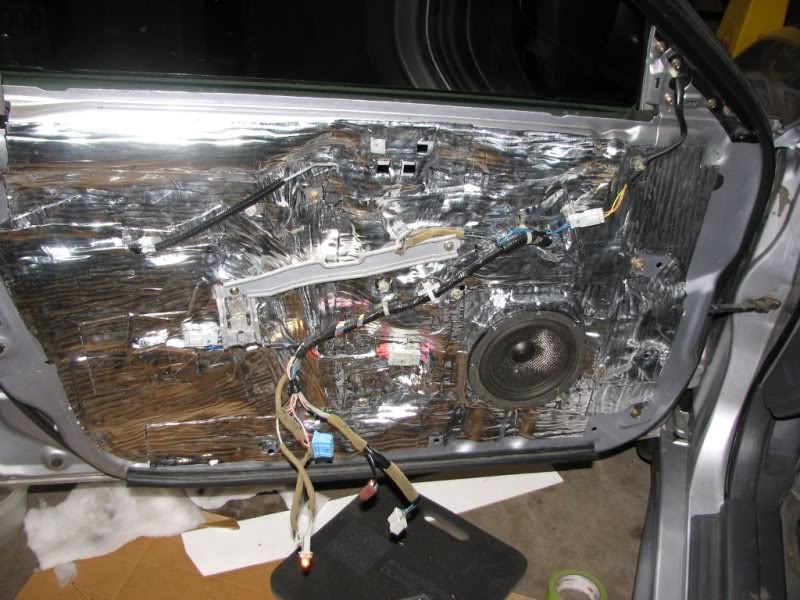
finishing touch, some open cell foam to ensure a good seal between the door and speaker.
finished door is sealed and ready to rock
finishing touch, some open cell foam to ensure a good seal between the door and speaker.
#32
12-24-2010, 09:02 AM
Join Date: Dec 2009
Location: Quad Cities, IL
Posts: 3,279
i hope these pictures help people build better car audio systems.
#33
01-03-2011, 07:45 PM
Join Date: Dec 2009
Location: Quad Cities, IL
Posts: 3,279
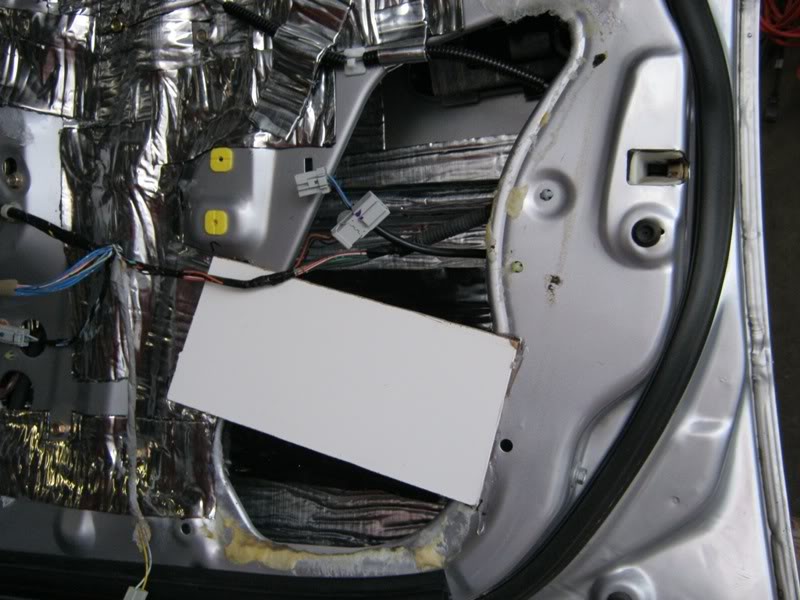
passenger side - same deal. here are some more detailed photos on sealing up the opening. you could use sheet metal instead of boards - same process either way.
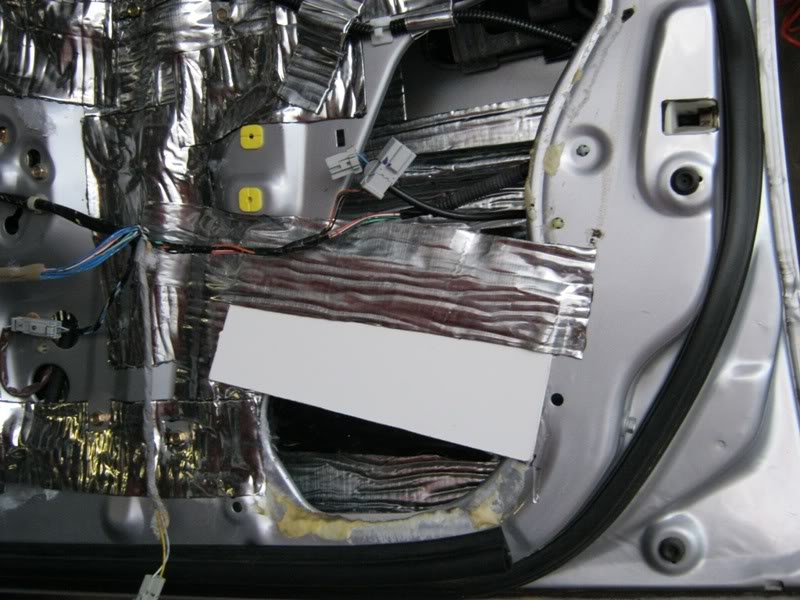
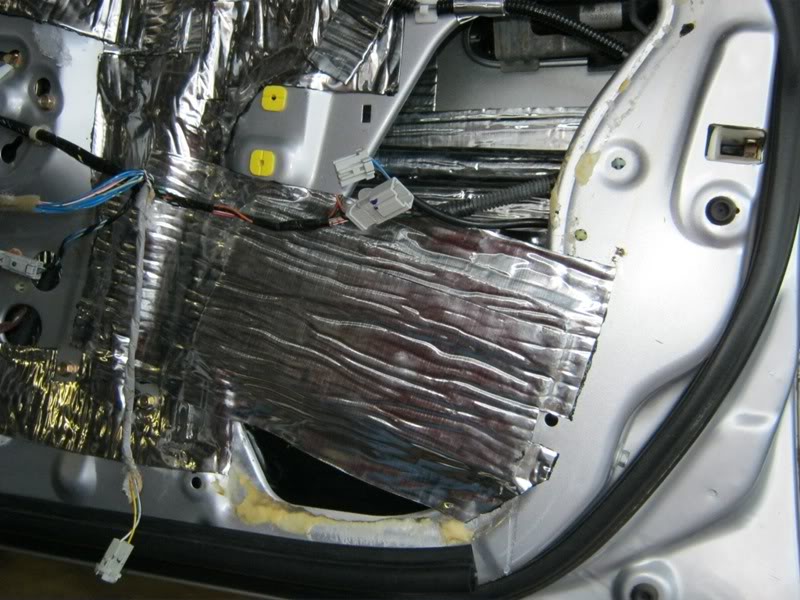
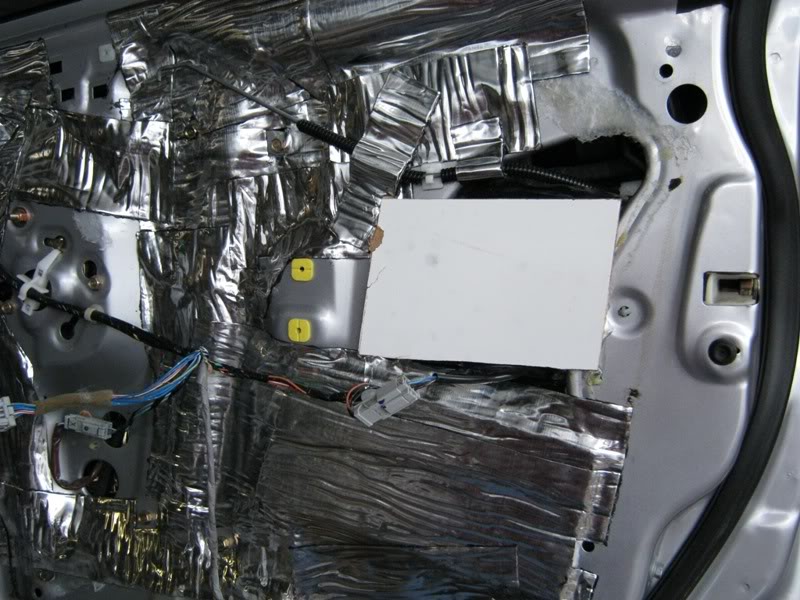
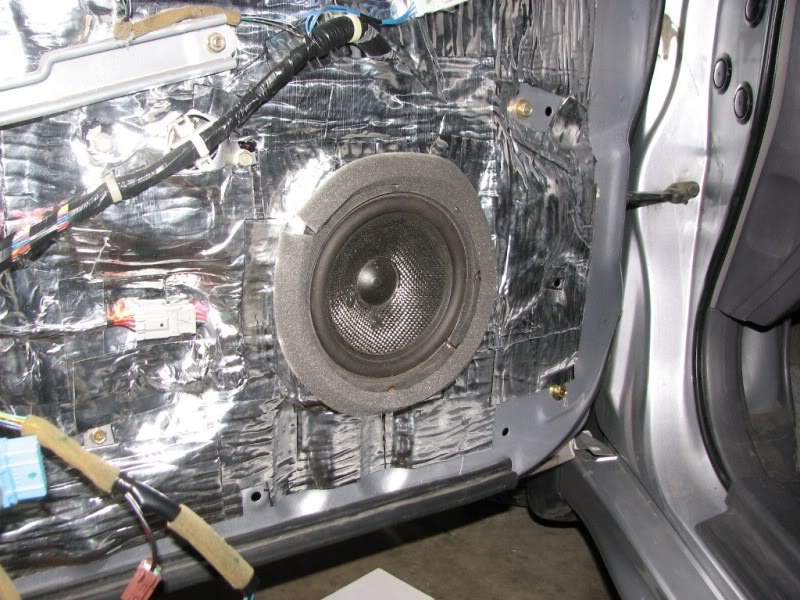
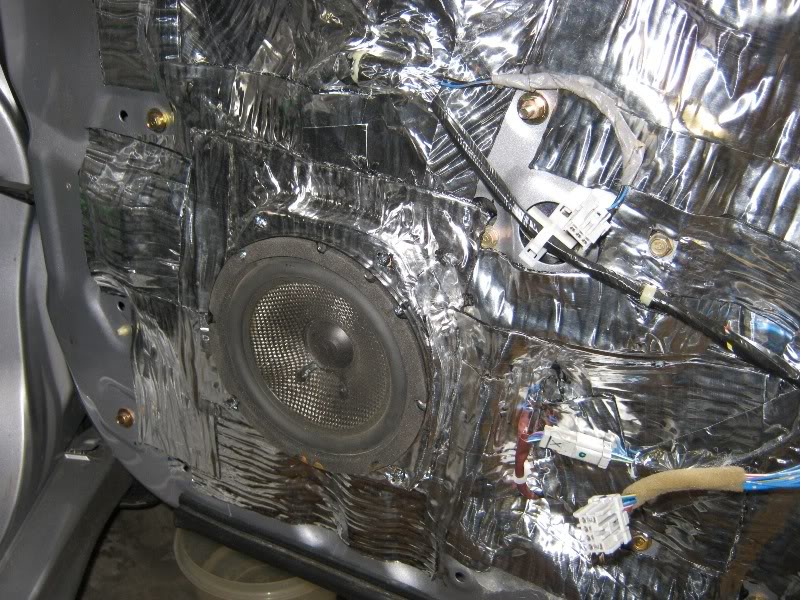
made a similar baffle for the passenger side, bolted and deadened the same as the driver side

new wire pulled and custom disconnects installed. i soldered new speaker wire to the driver, then insulated it all with heat shrink. this connector was wrapped in electrical tape for further insulation. wire was zip tied to factory wire loom inside the door.
and to facilitate the seal to the door panel - foam.
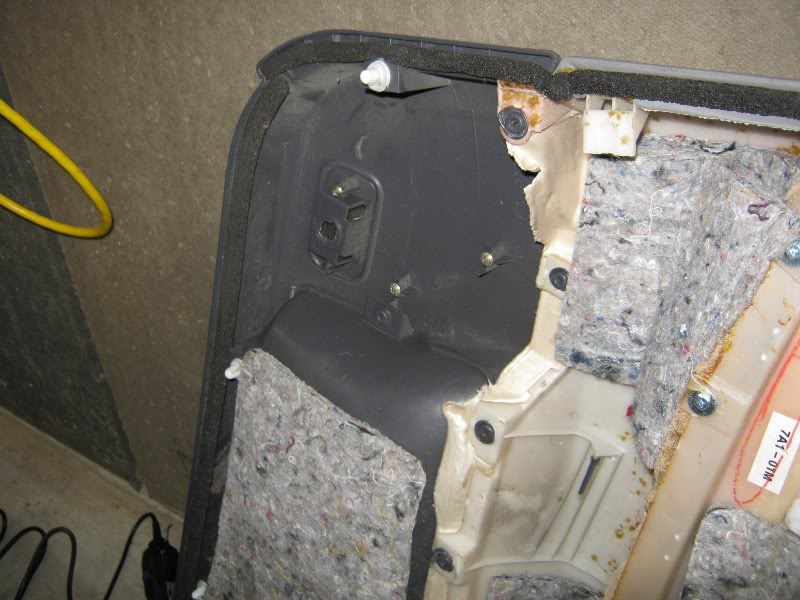
i had to remove this plastic piece since the hole was sealed up
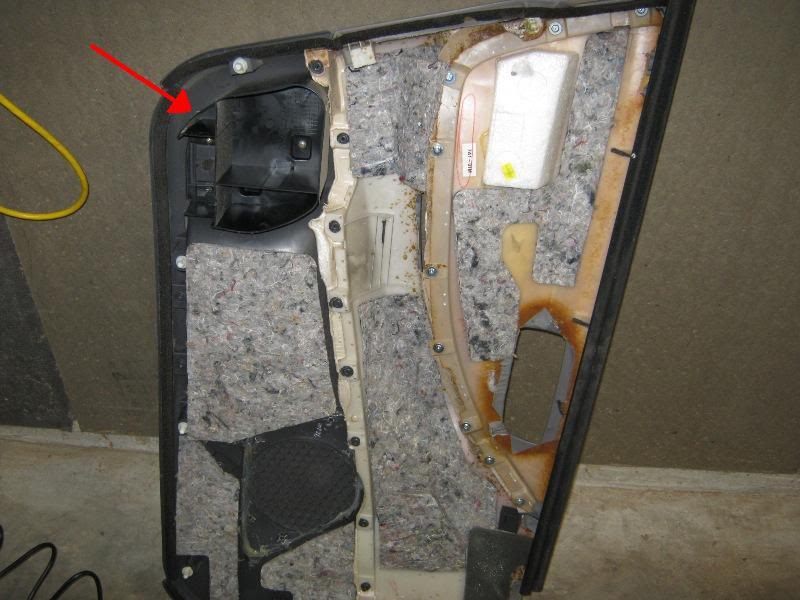
three screws and it comes off
made a similar baffle for the passenger side, bolted and deadened the same as the driver side
new wire pulled and custom disconnects installed. i soldered new speaker wire to the driver, then insulated it all with heat shrink. this connector was wrapped in electrical tape for further insulation. wire was zip tied to factory wire loom inside the door.
and to facilitate the seal to the door panel - foam.
i had to remove this plastic piece since the hole was sealed up
three screws and it comes off
#34
01-03-2011, 07:50 PM
Join Date: Dec 2009
Location: Quad Cities, IL
Posts: 3,279
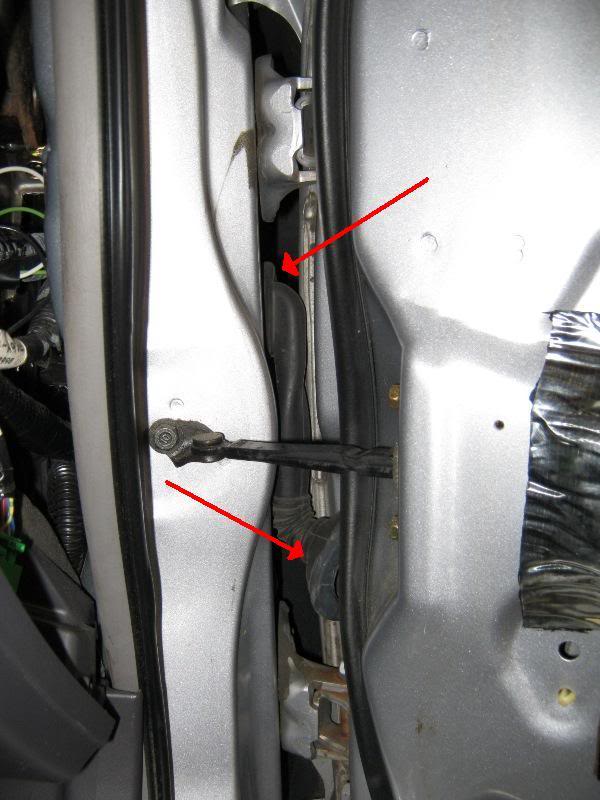
as for pulling new wire through the door of a 1998-2002 Accord - see below
locate the single wire harness that feeds the passenger door
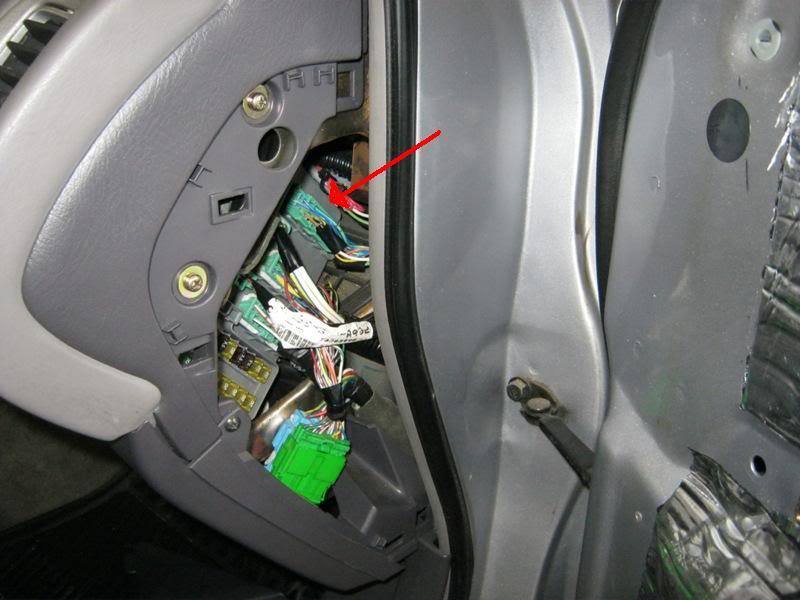
remove the harness. at this point you can pull it all the way out the factory opening, or just far enough to gain access for wire routing
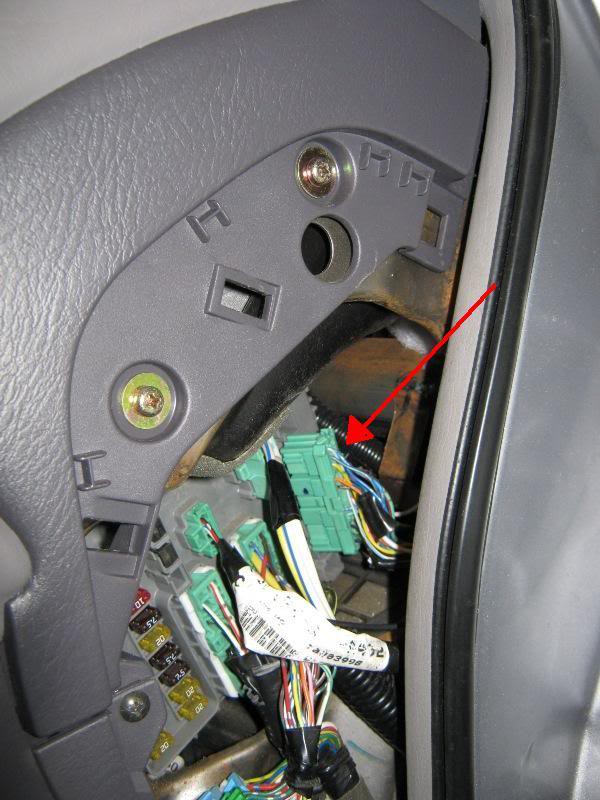
keep track of it's location and orientation
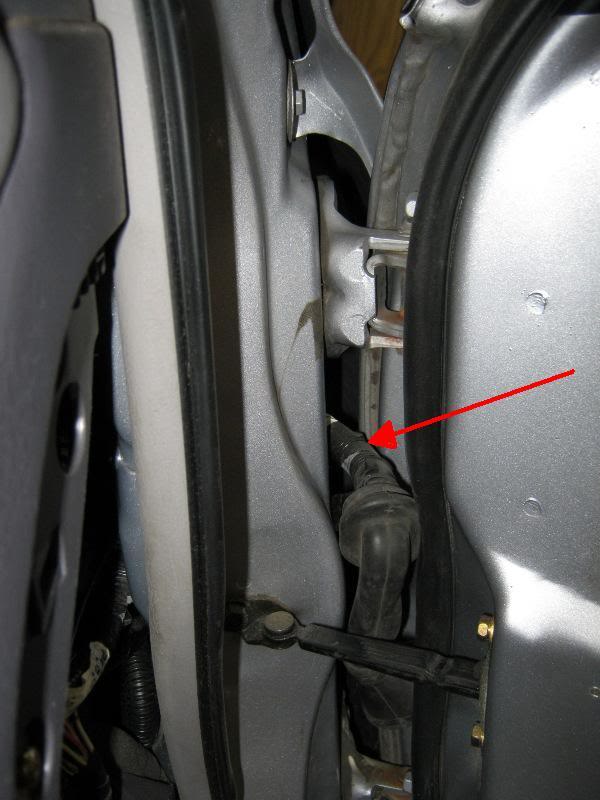
pry the rubber boot from both bottom and top - pull the wire from the top enough to gain access to the cabin side of the rubber boot
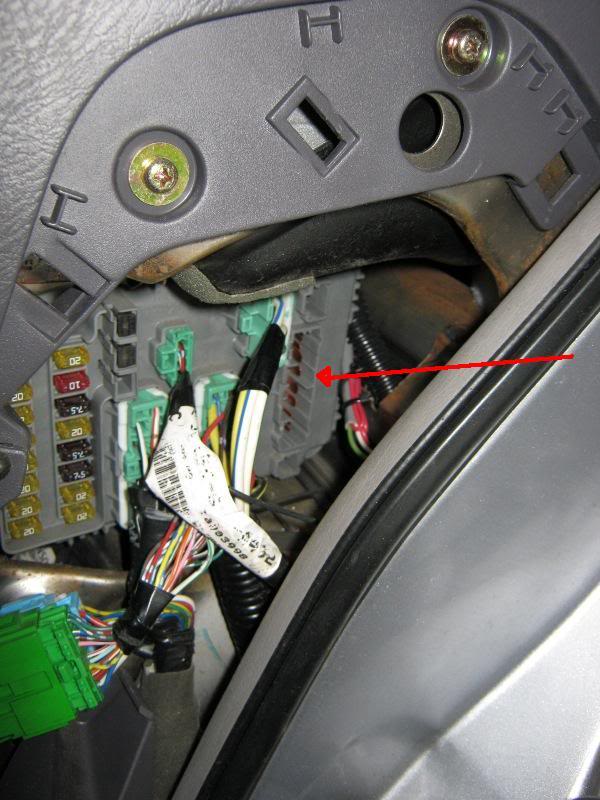
route a metal rod through the wire bundle - make sure it is not sharp or it could compromise the wiring. you may need to make a slit in the rubber boot - the part that is inside the cabin
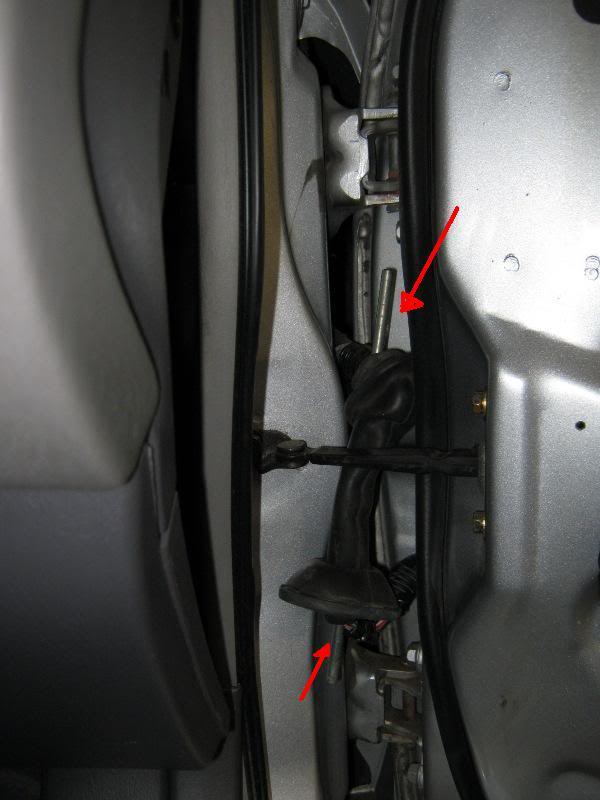
tape speaker wire to one side and pull it through - this is CL2 rated 12/2 wire
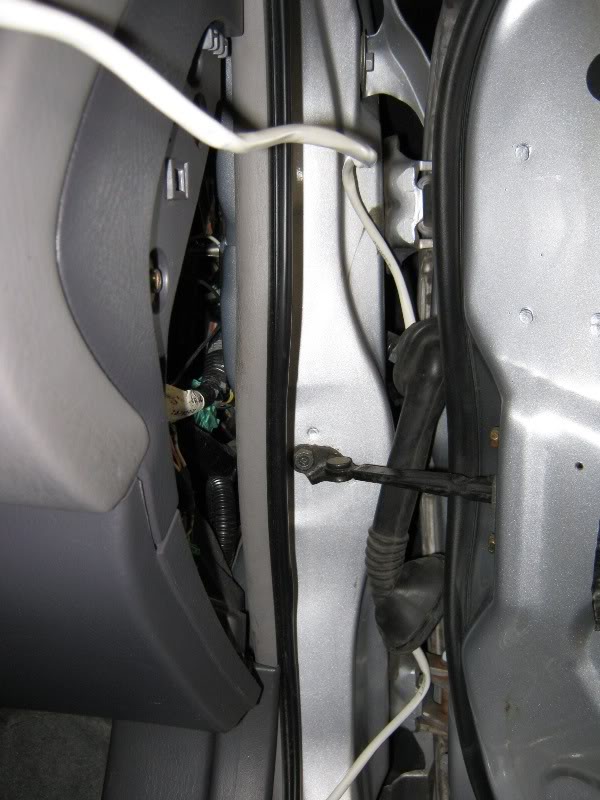
now you can feed the wire through the openings into the door and cabin. inside the door - use zip ties to secure the speaker wire to factory wire loom so it doesn't interfere with the window track. inside the cabin, route the wire so it is hidden in the dash - securing it to factory split loom every 12" or so.
make sure the rubber boots are fully seated - start on the back side and use a flat screwdriver to push in the rest. plug in the wire harness.
locate the single wire harness that feeds the passenger door
remove the harness. at this point you can pull it all the way out the factory opening, or just far enough to gain access for wire routing
keep track of it's location and orientation
pry the rubber boot from both bottom and top - pull the wire from the top enough to gain access to the cabin side of the rubber boot
route a metal rod through the wire bundle - make sure it is not sharp or it could compromise the wiring. you may need to make a slit in the rubber boot - the part that is inside the cabin
tape speaker wire to one side and pull it through - this is CL2 rated 12/2 wire
now you can feed the wire through the openings into the door and cabin. inside the door - use zip ties to secure the speaker wire to factory wire loom so it doesn't interfere with the window track. inside the cabin, route the wire so it is hidden in the dash - securing it to factory split loom every 12" or so.
make sure the rubber boots are fully seated - start on the back side and use a flat screwdriver to push in the rest. plug in the wire harness.
#35
01-03-2011, 09:46 PM

WOW this is a crazy topic! never really put much thought into using sound deadening or anything of that sort. now i'm totally considering throwing some in. thanks for the information!
#36
01-04-2011, 10:29 AM

just remember tho by doing this your adding weight. So if your going for performance you just adding more weight to our already heavy accords.
fast hondas = power to weight ratio...just keep that in mind
#37
01-04-2011, 10:33 PM
Join Date: Dec 2009
Location: Quad Cities, IL
Posts: 3,279
you are adding weight - but if you are adding speakers and amplifiers - then you need to deaden the metal to lower resonance and prevent backwave cancellation.
you also reduce road noise which results in a much more enjoyable driving experience.
the difference is night and day. just rap on the outside of my doors and you hear a low thud, not a twang.
you also reduce road noise which results in a much more enjoyable driving experience.
the difference is night and day. just rap on the outside of my doors and you hear a low thud, not a twang.
#38
03-13-2011, 03:55 PM

Keep Hope Alive,
First, thanks for all the great info and pics. I have a 2DR 01 Accord EX which I'm in the process of upgrading the sound system.
I've been reading everything I can on these forums trying to get up to speed on good speaker installation. I'm looking forward to following your deadening and mdf board model. Here's what I'm working with...
Head Unit: Kenwood Excelon
Front: Alpine S 600c components w/ built-in crossovers (to be installed soon).
Rear: to be determined
No Amp or Sub for now.
Anyway I was wondering with your custom baffles are you covering up the rear(magnets) of your 6.5 speakers?(hard to tell from the photos) Or is it just the foam "channel" on the top that's protecting the woofer from the elements? Or are you using the foam baffles (XTC) as well?
Also I'm reading a lot of contradictory advice on foam baffles and their effect upon what little bass the woofers have to offer and whether or not to cut holes. Any suggestions?
#39
03-13-2011, 10:55 PM
Join Date: Dec 2009
Location: Quad Cities, IL
Posts: 3,279
good questions.
my speakers are open to play into the door cavity. that airspace is crucial for low frequency response and midbass. also crucial is the seal between the rear of the speaker and the front of the speaker. i use foam to create seals around the speaker between speaker and wooden baffle, between baffle and door, and between speaker and door panel grill. if you put them in small sealed foam enclosures the performance would greatly suffer, especially with closed cell foam. it would be like putting them in too small of a box.
the XTC baffles look neat but need to be cut and trimmed in order to have depth clearance (the are too deep anyway) and you need to cut out the bottom half for airspace.
i used foam to create a channel above the speaker so water running down the inside has a diversion. sound deadening is crucial for a good sounding system since vehicle steel is so thin and resonant. you'll know when you've done a good job and you knock on the outside of the car and hear a satisfying "thud".
equally important is good amplification. a head unit will always disappoint when powering speakers. it's fine for background music but shouldn't be expected to perform at high volume.
