
Installing door speakers and sound deadening and more
#61
 07-15-2012, 05:23 PM


Join Date: Dec 2009
Location: Quad Cities, IL
Posts: 3,279
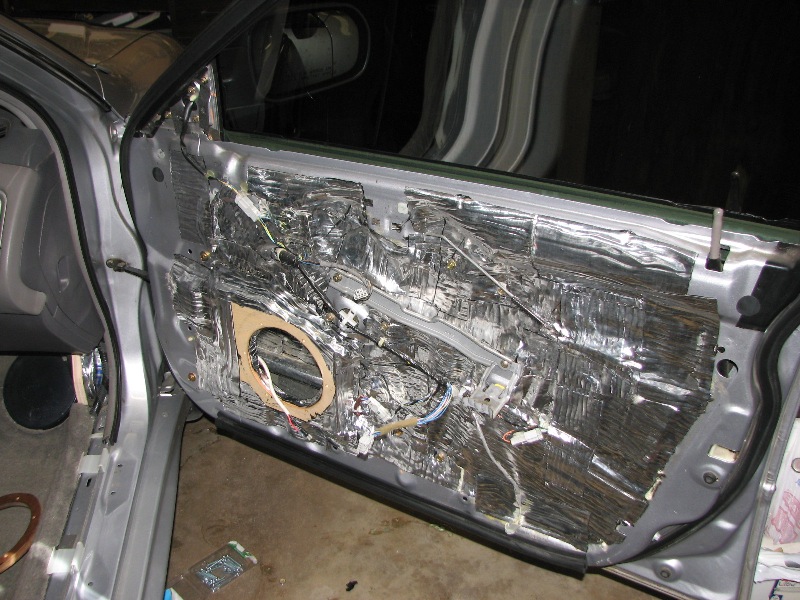
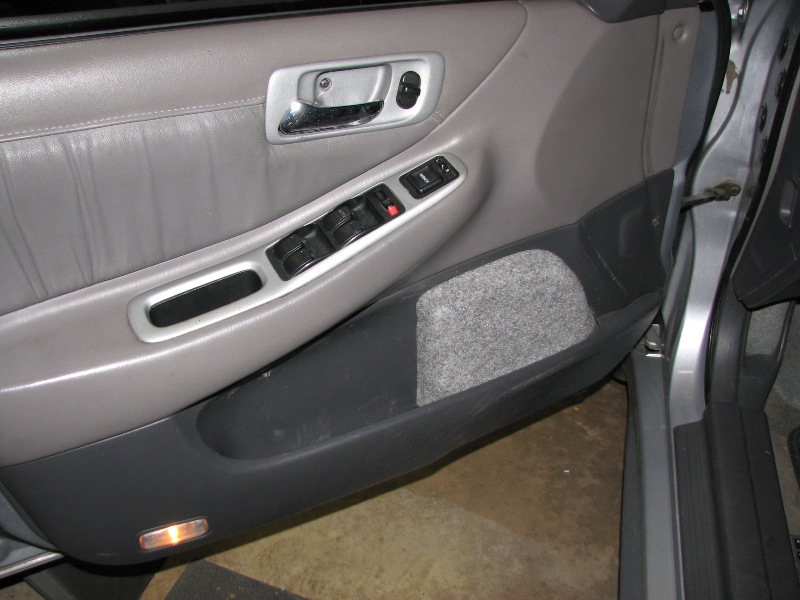
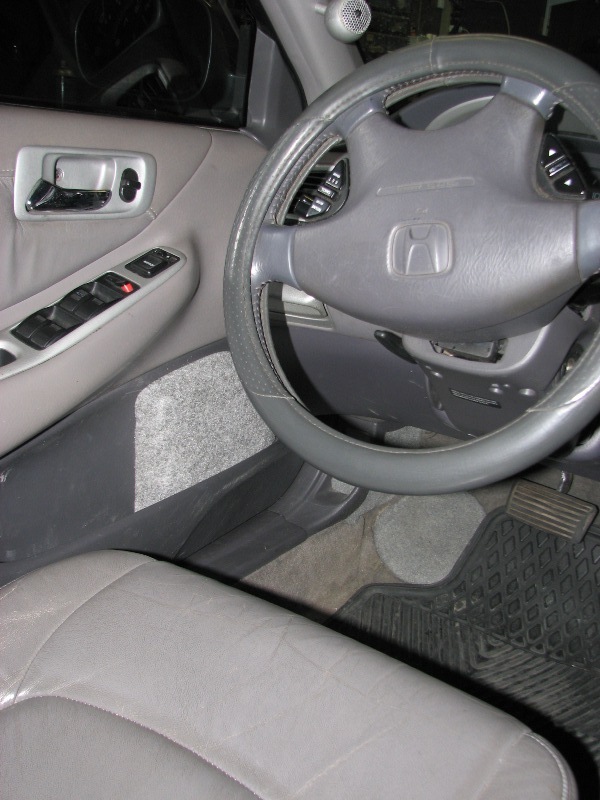
panel test fit, had to make a few passes to get the clearance right, hence the odd shape on the one side. had door panel seam conflicts
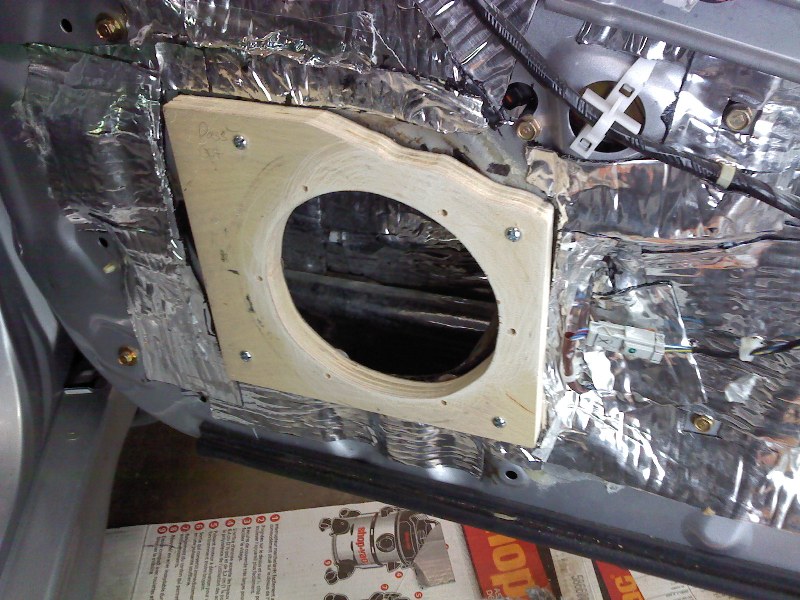
some of these are with my camera phone, hence any blurry pics
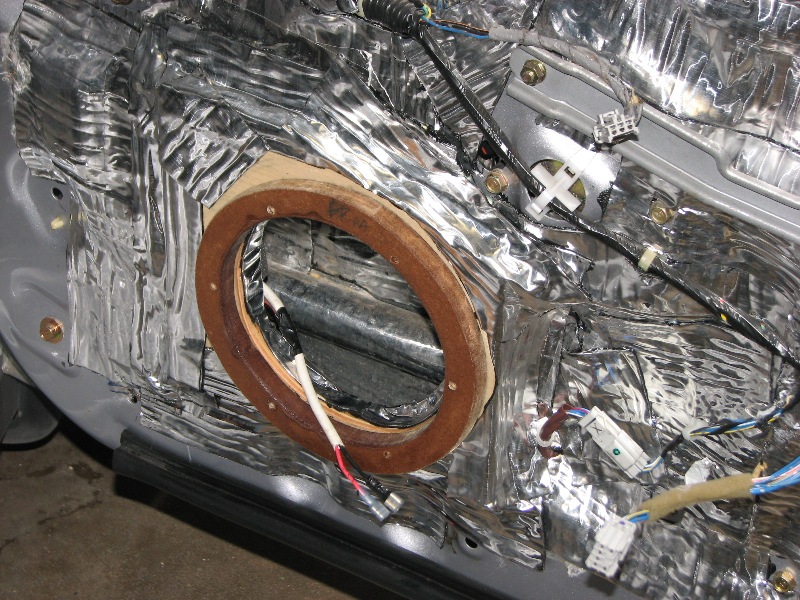
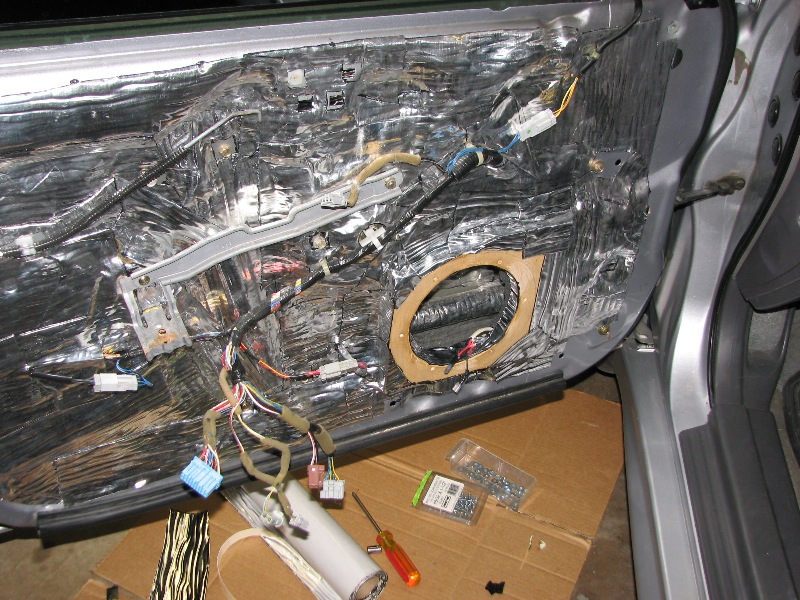
coated in resin
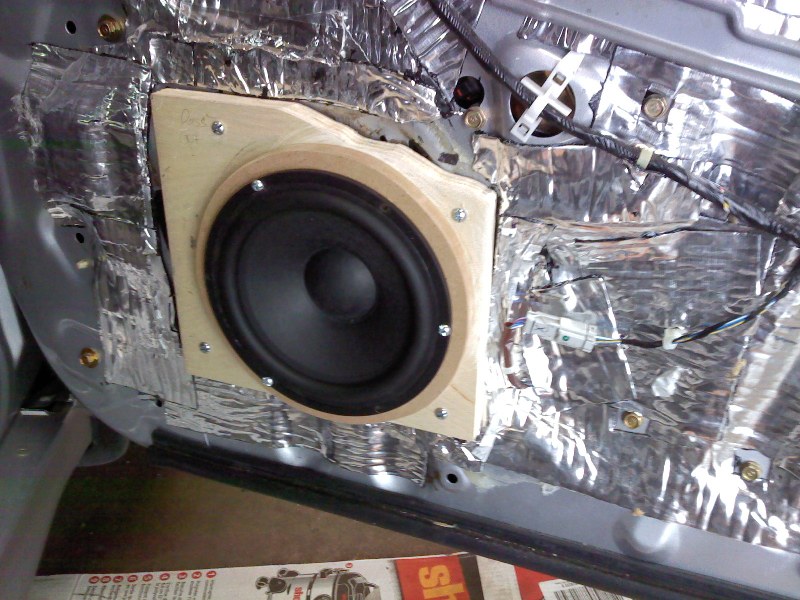
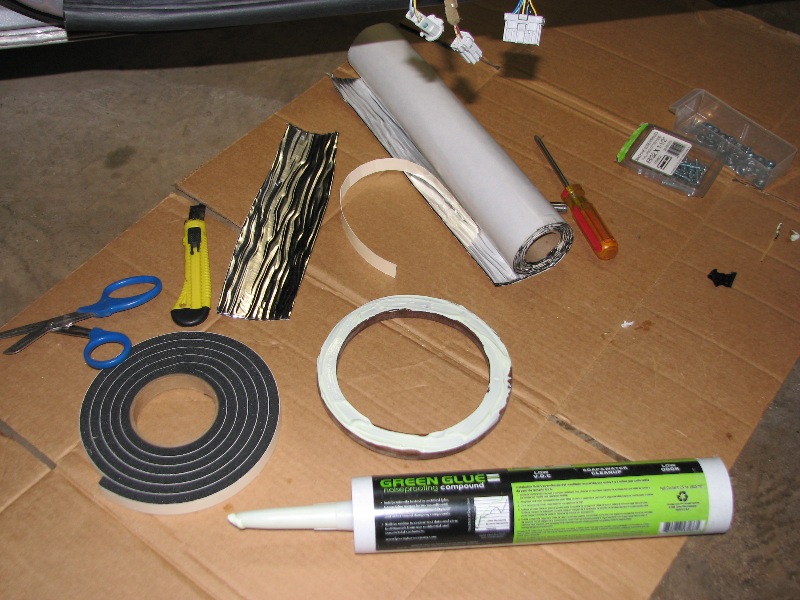
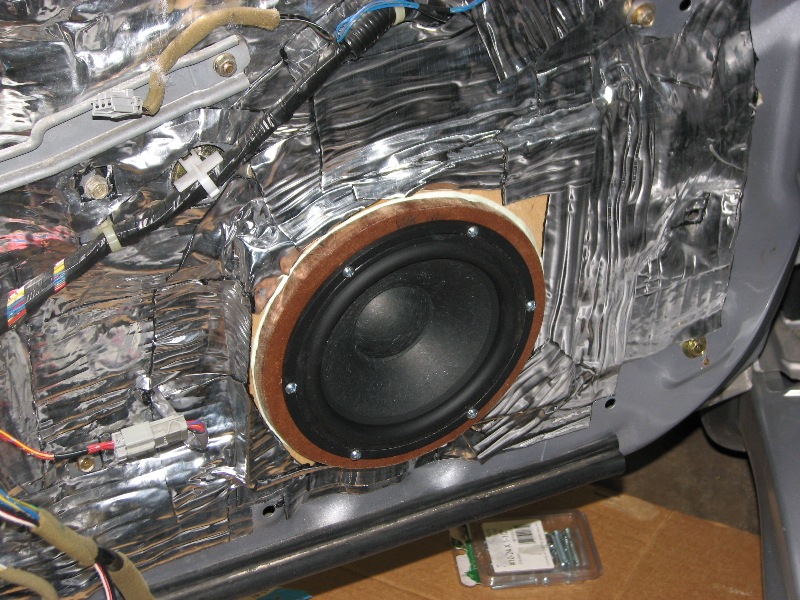
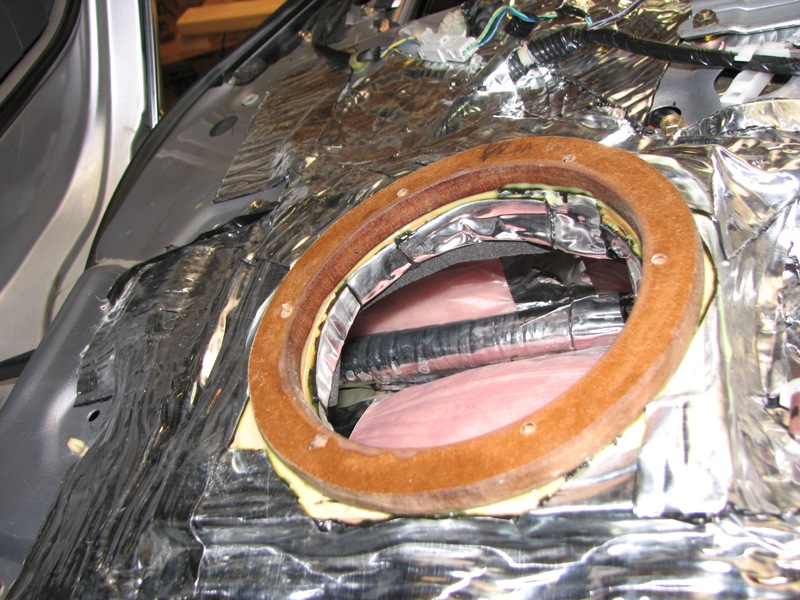
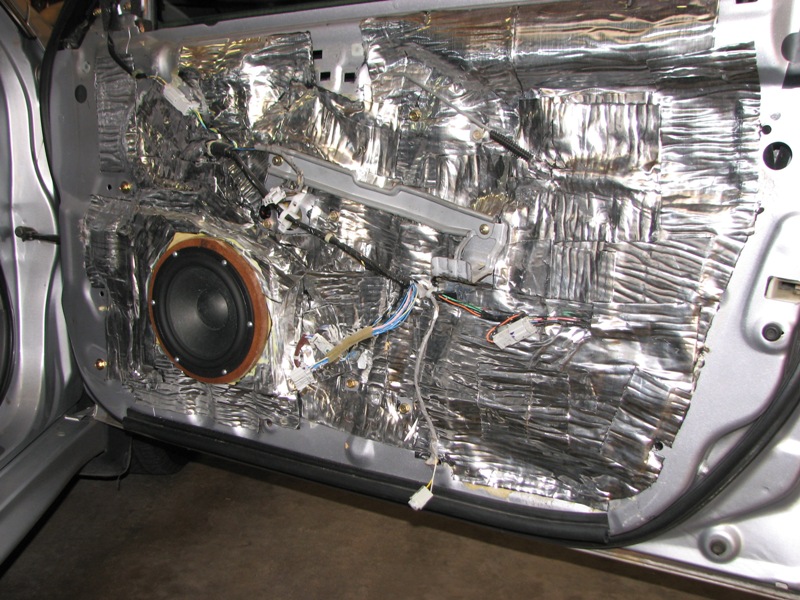
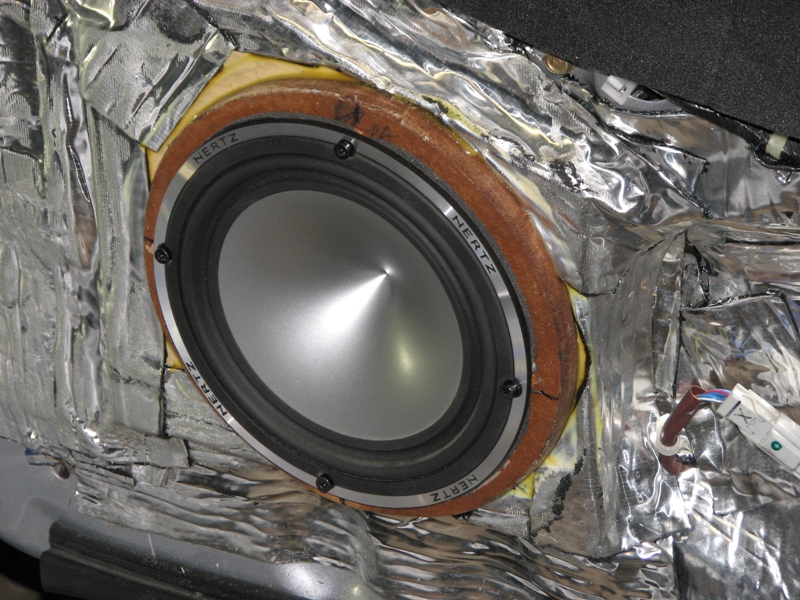
passenger side bolted in place, green glue damping compound, Raammat BXT for seals
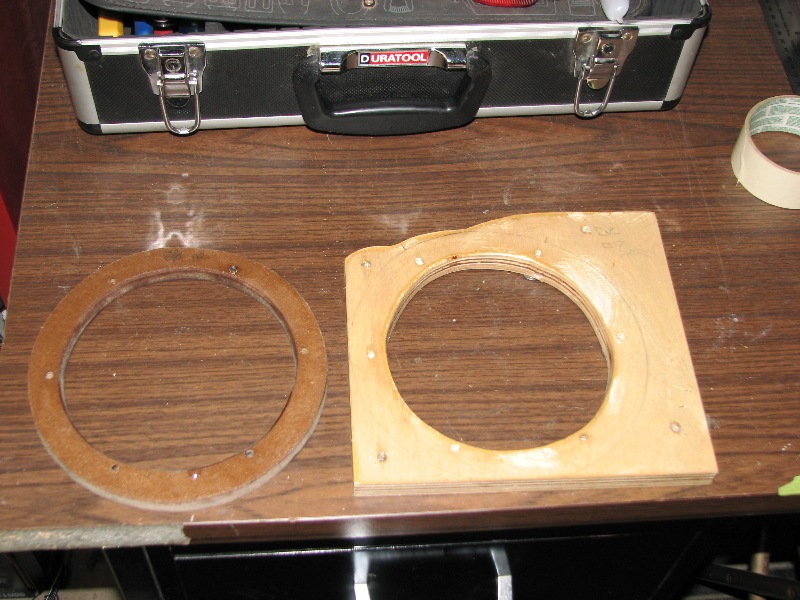
green glue on ring too
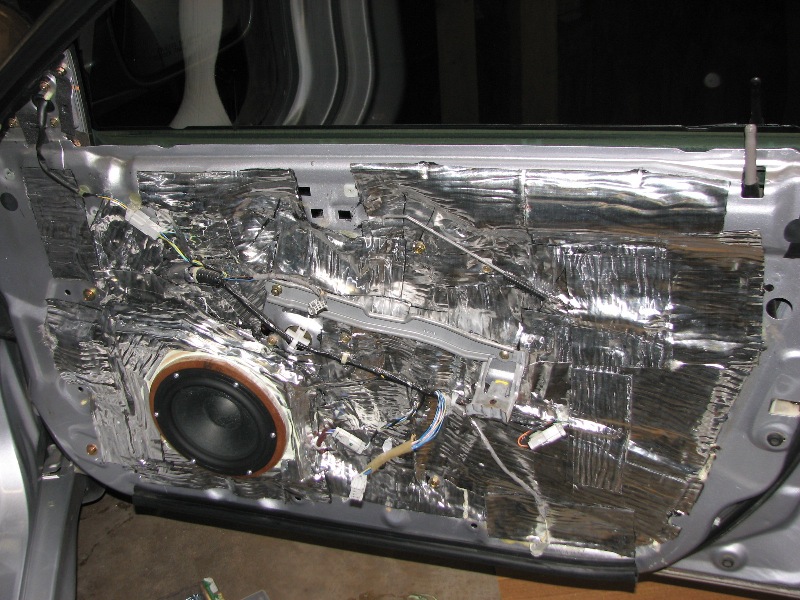
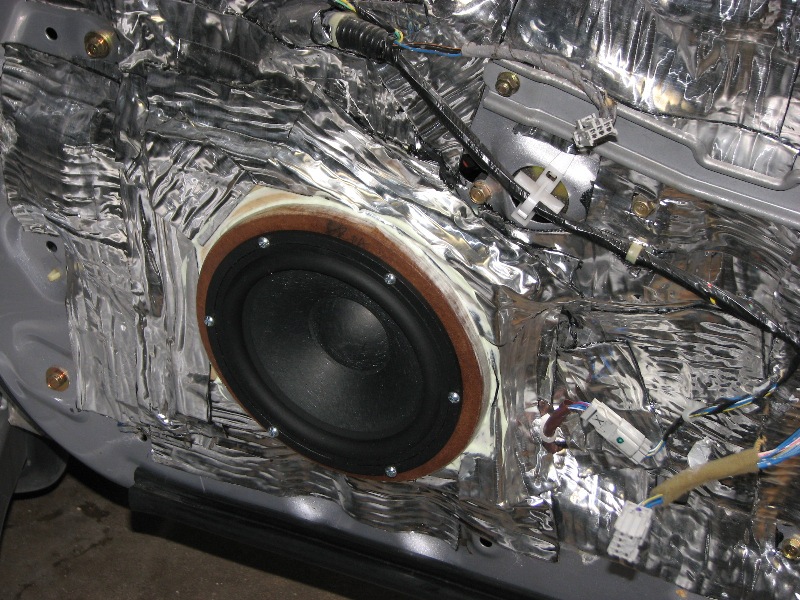
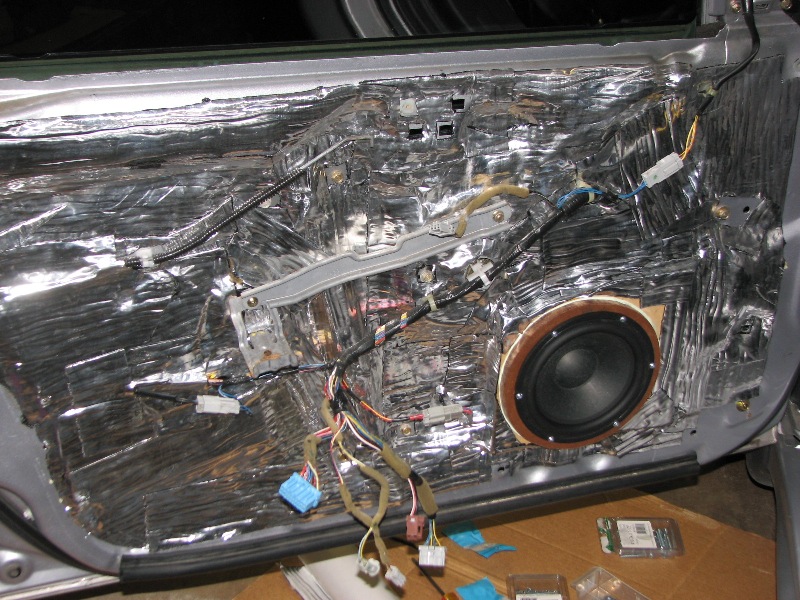
mounted/wired
some of these are with my camera phone, hence any blurry pics
coated in resin
passenger side bolted in place, green glue damping compound, Raammat BXT for seals
green glue on ring too
mounted/wired
#62
07-15-2012, 05:23 PM
Join Date: Dec 2009
Location: Quad Cities, IL
Posts: 3,279
the Green Glue was quite runny on this hot day.
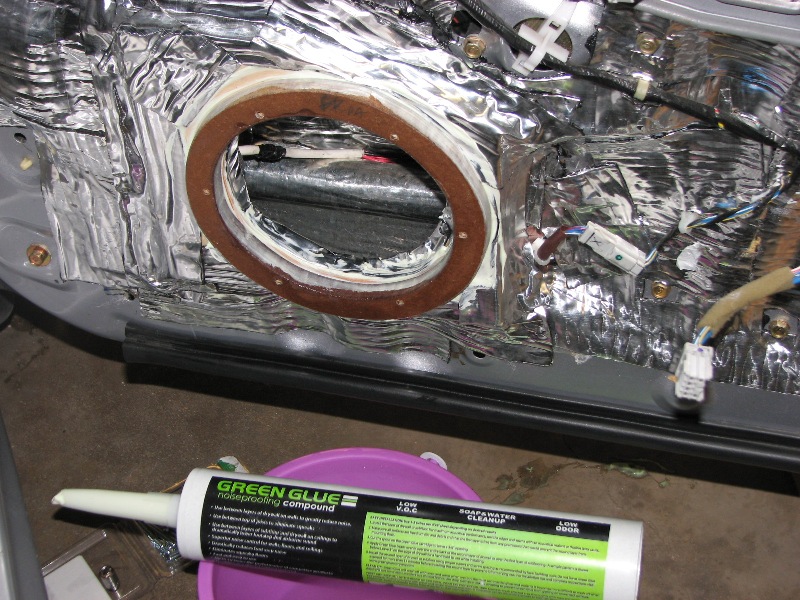
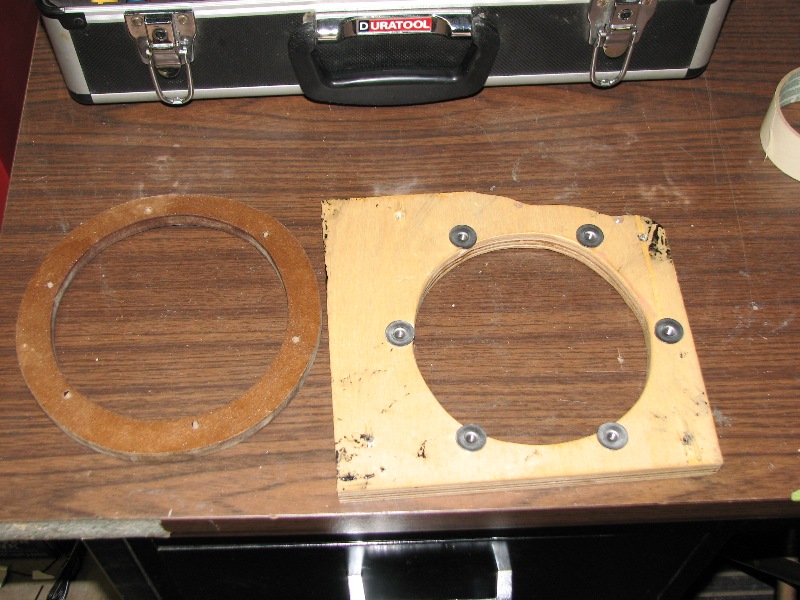
used closed cell foam for my rain barrier ring inside the door. this is an application of Green Glue on the back of the mounting ring.
driver side is the same as passenger
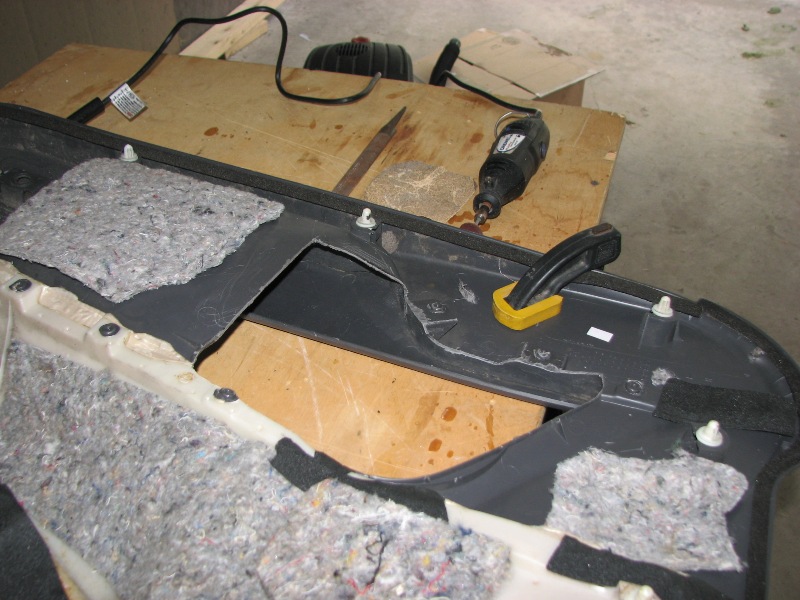
used a dremel with a cutting wheel for the first pass on the door panel. final cutting may be larger just for consistency of lines... we'll see. for now, i can take my 700 mile trip with new speakers to listen to

how the amps are currently wired
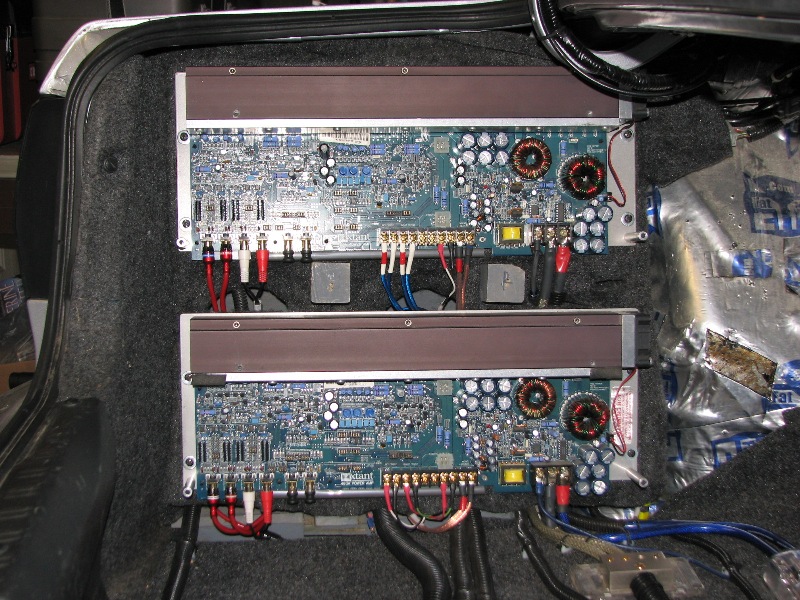
An Alpine DRE-A200 providing an extra active crossover split between mids and tweeters.
start to finish, the pics you see were done this weekend while also spending 8 hours wiring a boat, playing with the kids, and hanging with friends. i think it was about 7 hours of work total.
used closed cell foam for my rain barrier ring inside the door. this is an application of Green Glue on the back of the mounting ring.
driver side is the same as passenger
used a dremel with a cutting wheel for the first pass on the door panel. final cutting may be larger just for consistency of lines... we'll see. for now, i can take my 700 mile trip with new speakers to listen to
how the amps are currently wired
An Alpine DRE-A200 providing an extra active crossover split between mids and tweeters.
start to finish, the pics you see were done this weekend while also spending 8 hours wiring a boat, playing with the kids, and hanging with friends. i think it was about 7 hours of work total.
#63
07-15-2012, 05:24 PM
Join Date: Dec 2009
Location: Quad Cities, IL
Posts: 3,279
this is something i haven't seen in a build log yet. pvc encased fiberglass absorption. i've seen people use foams or polyfill but those have issues. foams aren't absorptive enough (especially if they are closed cell). polyfill isn't absorptive much as-is. the doors get wet so any fibrous material will hold water = mold.
in architectural acoustics, we use pvc encased fiberglass batt to cheaply add a lot of absorption to a room.
i've had this idea for a while, finally felt like doing it.
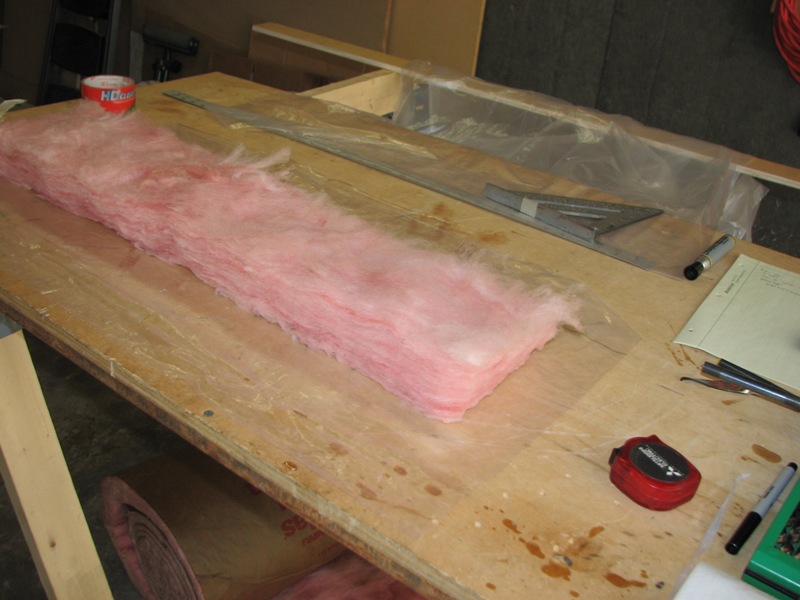
i started with 1 mil PVC sheeting - it is normally used as a drop cloth for painting. it was stupid cheap, like $3 for a roll. i have some fiberglass batt insulation as well. fiberglass batt is one of the absolute best materials for sound absorption. just about anything else performs worse. the concern is that you don't want it getting wet.
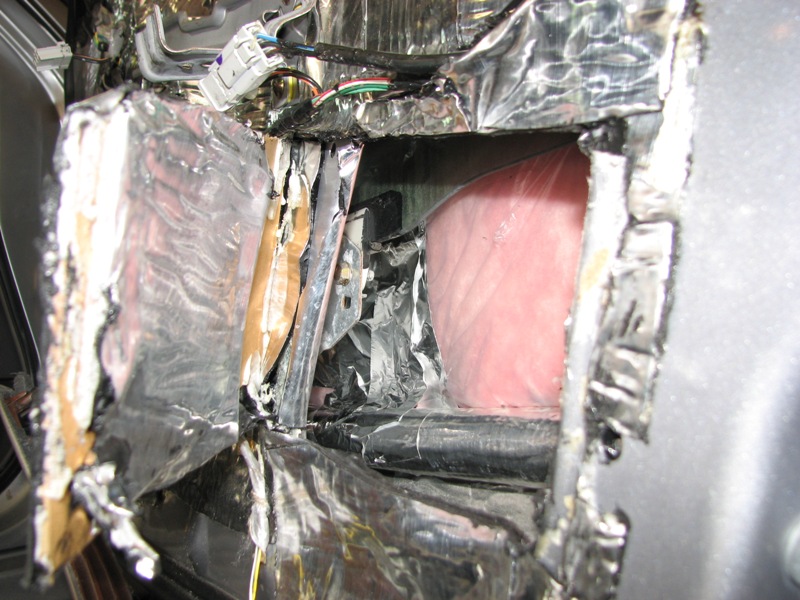
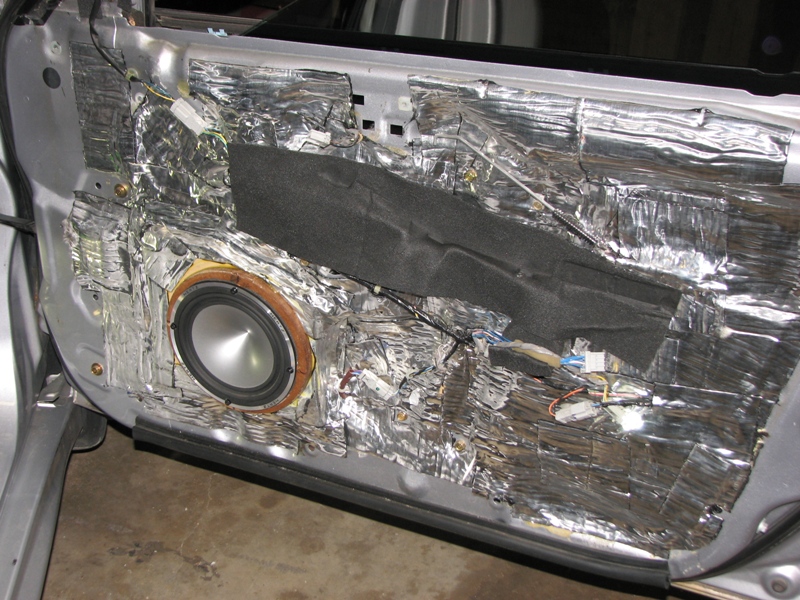
i measured my doors, they have two metal tubes that provide structural strength. i will fit absorption between these. if i had 2" thick bags, they wouldn't interfere with the window. my doors were already sealed up, luckily i used several smaller panels to cover the gap, so i just cut and peeled one of them back:
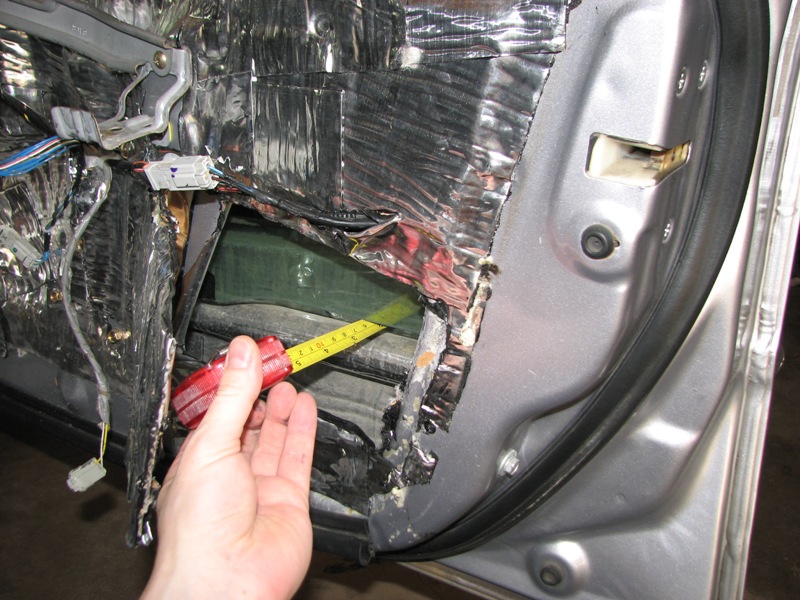
i needed 6" tall, 30" long, and 2" thick bags. i cut out 18" tall by 33" long sheets of PVC.
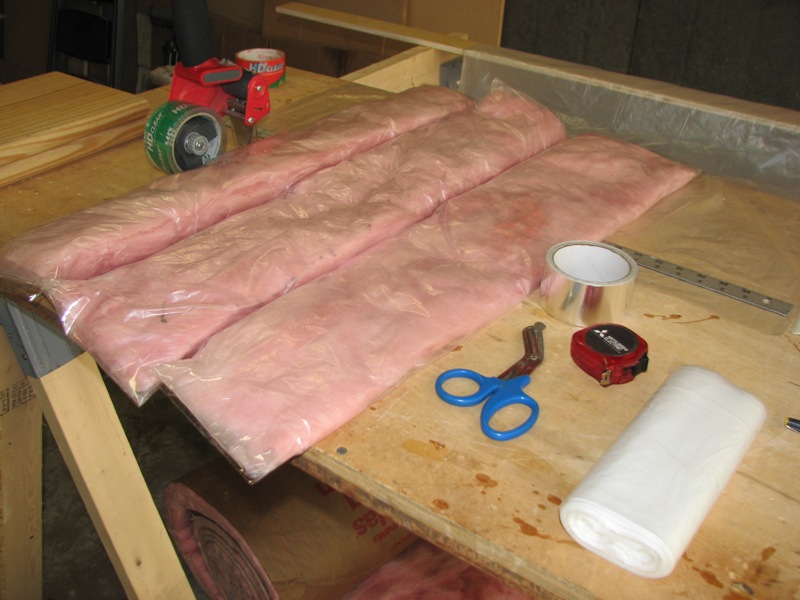
i wrapped and compressed it for covering. i used 3M Duct Packing Tape to create the seal.
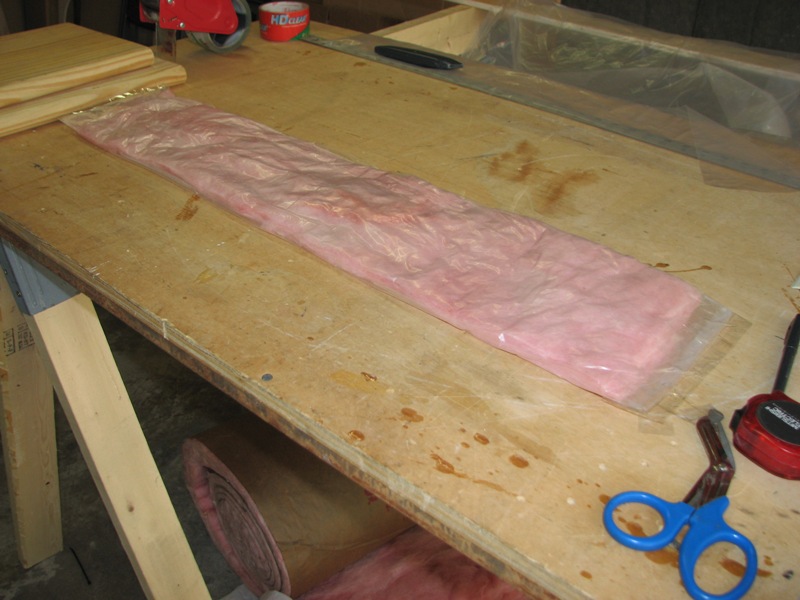
i made three of them for the passenger door
then i placed them and used aluminum foil tape to hold them in place between the bars
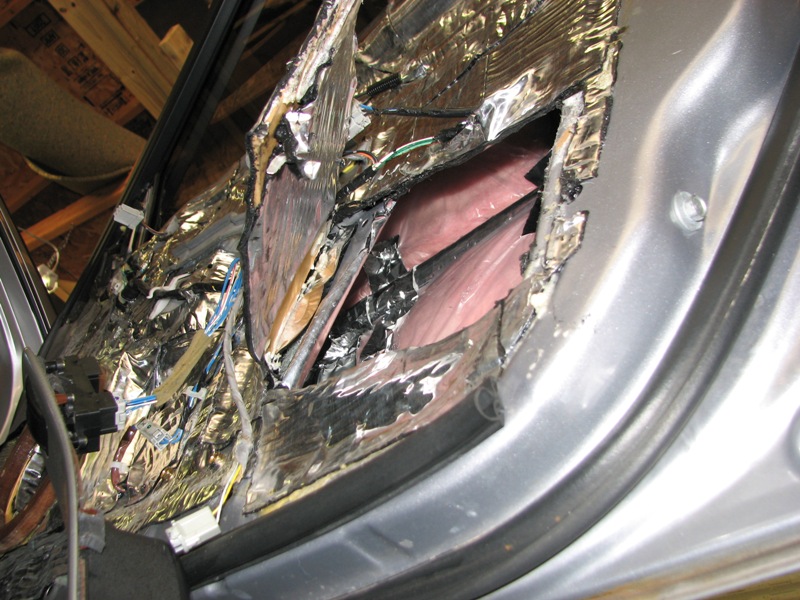
the window guide came down in the middle. this was a snag/tear possibility. so i covered that portion with aluminum foil tape to protect it.
all done, 100% coverage along the entire outer door skin, with a fourth smaller bag stuffed up near the hinge airspace
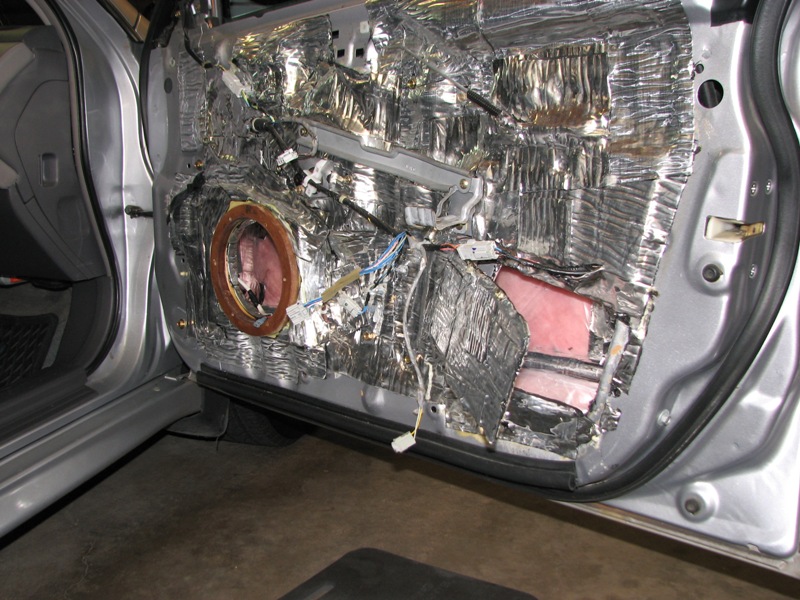
closed up with a few layers
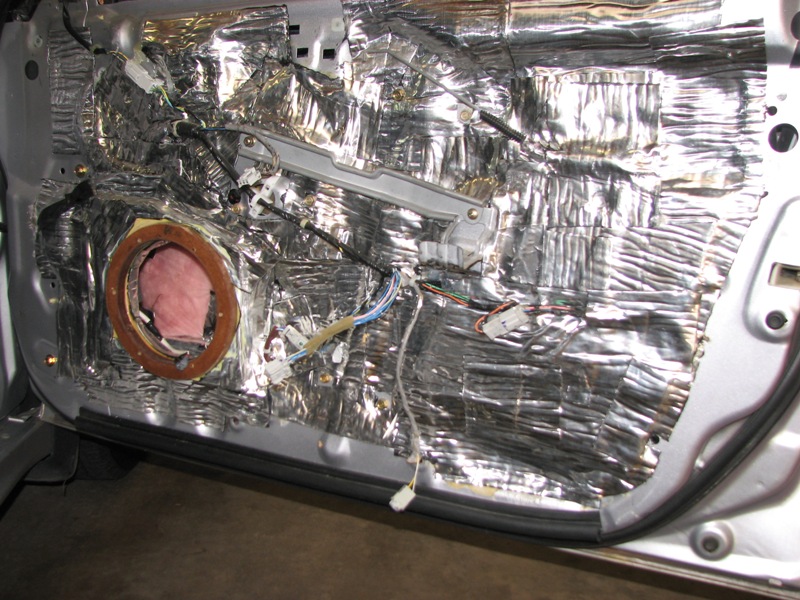
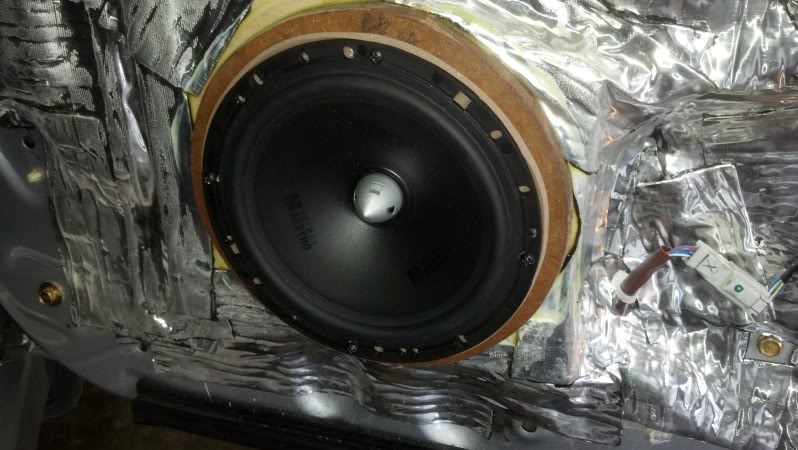
driver mounted.
before i do the driver's side i'll use the RTA and 1/24th oct resolution to measure drivers (untreated) vs. passenger (treated). my measurement locations, driver settings, etc. will be equivalent enough to allow for an accurate comparison. the goal with this is to improve midrange response as well as absorb a nasty 125Hz (ish) spike. i hope to test tonight, then do the driver's door.
if all goes as planned, i will recommend this for anyone sealing up their door. this was easy to do, took about 5 minutes per bag an would be very easy to do before the door is sealed if you're deadening it anyway. i expect this to greatly improve response for the door woofers.
in architectural acoustics, we use pvc encased fiberglass batt to cheaply add a lot of absorption to a room.
i've had this idea for a while, finally felt like doing it.
i started with 1 mil PVC sheeting - it is normally used as a drop cloth for painting. it was stupid cheap, like $3 for a roll. i have some fiberglass batt insulation as well. fiberglass batt is one of the absolute best materials for sound absorption. just about anything else performs worse. the concern is that you don't want it getting wet.
i measured my doors, they have two metal tubes that provide structural strength. i will fit absorption between these. if i had 2" thick bags, they wouldn't interfere with the window. my doors were already sealed up, luckily i used several smaller panels to cover the gap, so i just cut and peeled one of them back:
i needed 6" tall, 30" long, and 2" thick bags. i cut out 18" tall by 33" long sheets of PVC.
i wrapped and compressed it for covering. i used 3M Duct Packing Tape to create the seal.
i made three of them for the passenger door
then i placed them and used aluminum foil tape to hold them in place between the bars
the window guide came down in the middle. this was a snag/tear possibility. so i covered that portion with aluminum foil tape to protect it.
all done, 100% coverage along the entire outer door skin, with a fourth smaller bag stuffed up near the hinge airspace
closed up with a few layers
driver mounted.
before i do the driver's side i'll use the RTA and 1/24th oct resolution to measure drivers (untreated) vs. passenger (treated). my measurement locations, driver settings, etc. will be equivalent enough to allow for an accurate comparison. the goal with this is to improve midrange response as well as absorb a nasty 125Hz (ish) spike. i hope to test tonight, then do the driver's door.
if all goes as planned, i will recommend this for anyone sealing up their door. this was easy to do, took about 5 minutes per bag an would be very easy to do before the door is sealed if you're deadening it anyway. i expect this to greatly improve response for the door woofers.
#64
09-23-2012, 08:36 AM
Join Date: Dec 2009
Location: Quad Cities, IL
Posts: 3,279
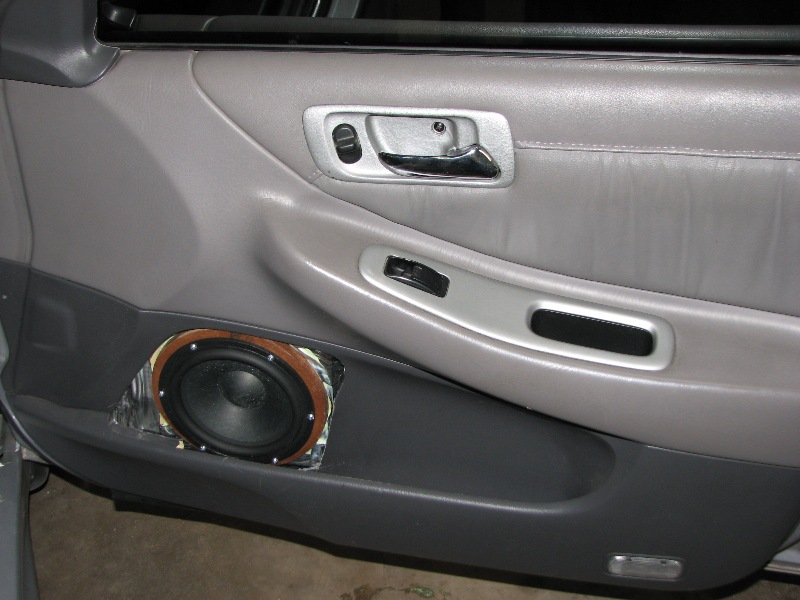
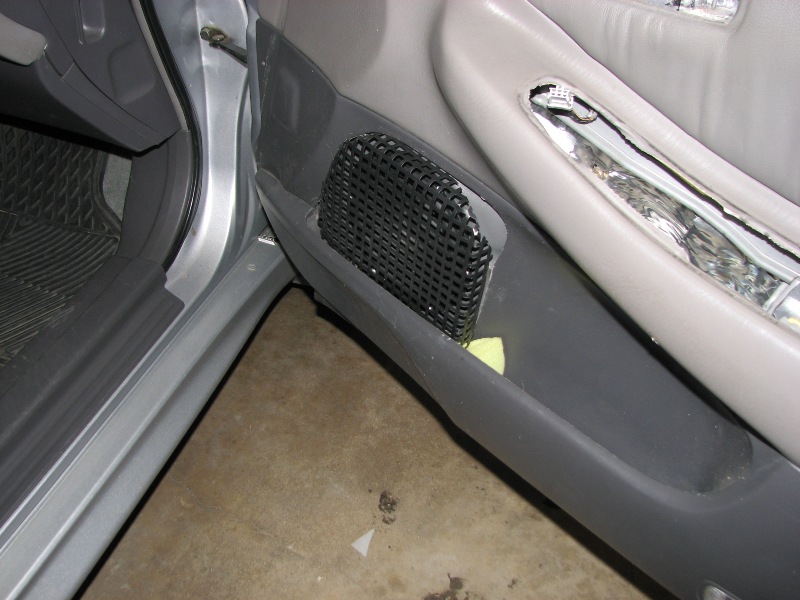
so around midnight i decided to take a 10" woofer grill and make a new door panel grill.
i've had this idea in my head for a long time, but i figured i would need a 12" grill in order to cover the way i wanted. turns out, a 10" grill was just perfect if i covered it.
i began by cutting and bending, test fitting, cutting and bending some more, test fitting some more, etc.
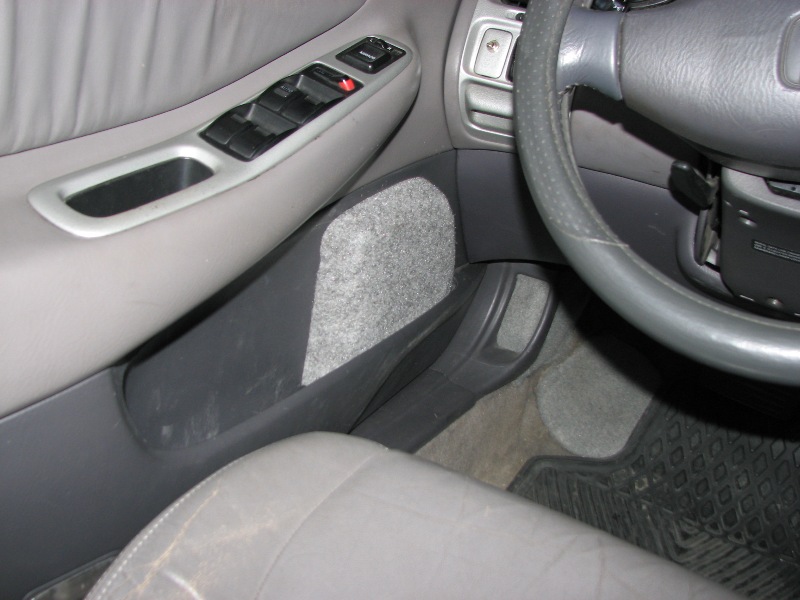
you can see that the door panels were cut in order to make room for the lowered/deeper woofers
so i wanted the grill to come behind the pocket, but then follow the contour of the factory opening. the front corner would not be covered due to the smaller grill size.

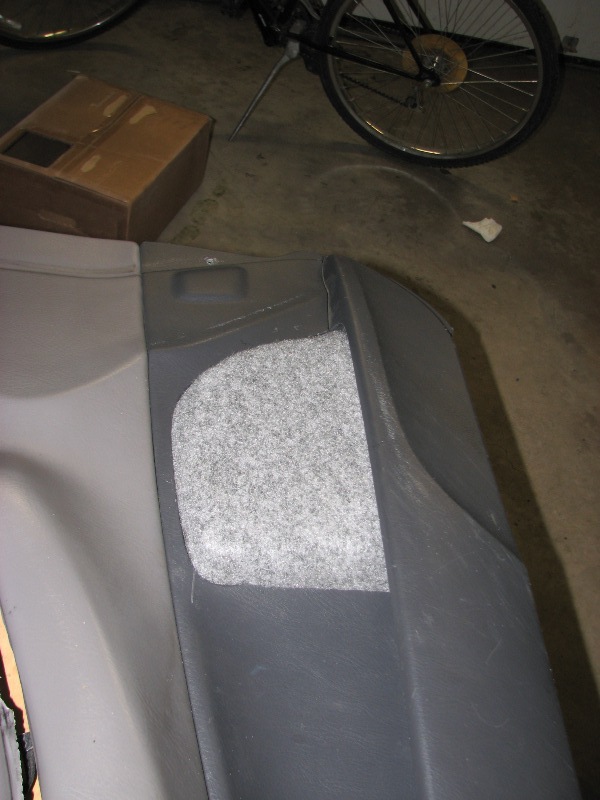
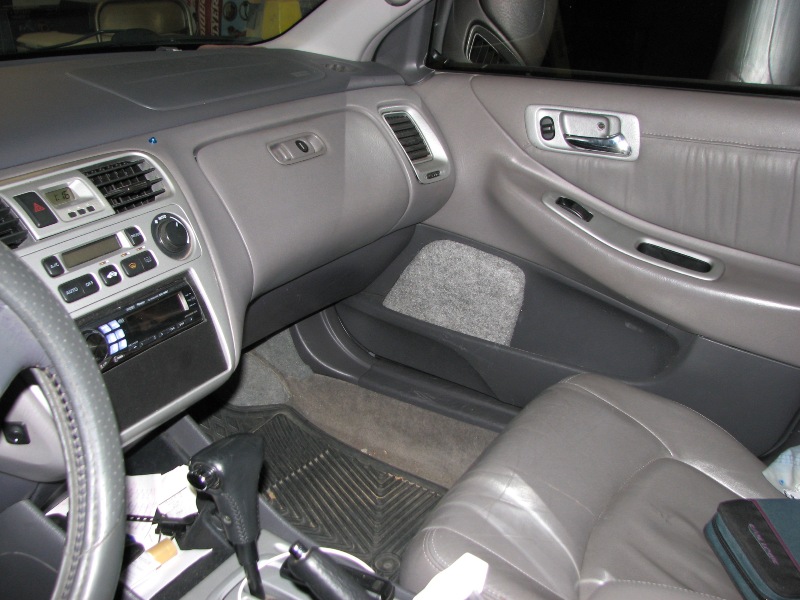
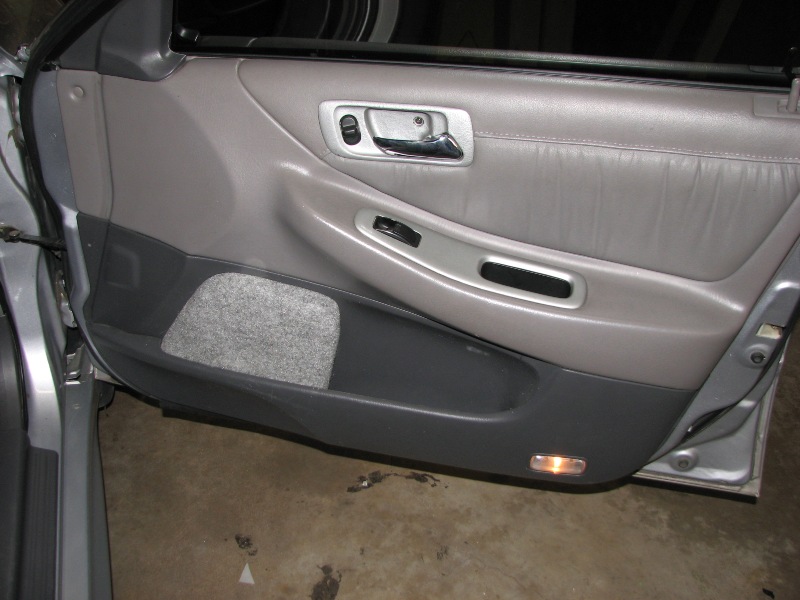
i was going to use grill cloth, but that would be too thin and show the edges and frame of the grill. a round hole expanded metal grill could be done to look nice and more polished (in the future maybe). i decided to use open weave carpet. having the color different is fine, i have silver accents in the interior.
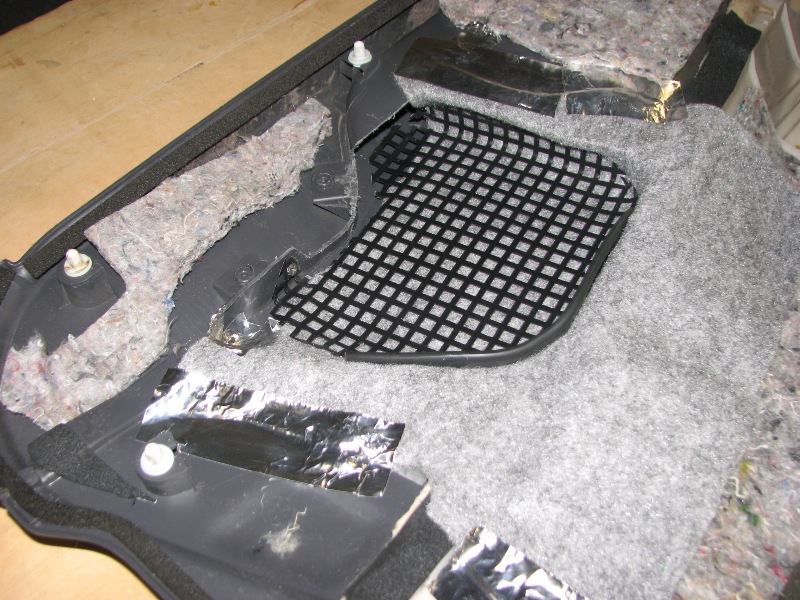
i trimmed some more, fitted some more, and got the grills to secure to the door panel. then i used trusty aluminum foil tape to secure the carpet. both have some of the rubber grill edging where it would contact the vinyl.
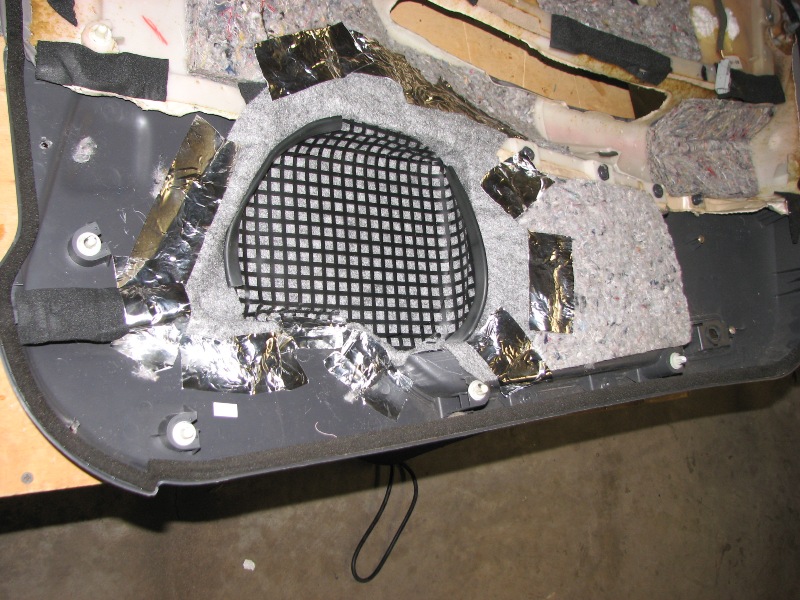
the result was pretty much what i wanted to achieve (at 2am)

i've had this idea in my head for a long time, but i figured i would need a 12" grill in order to cover the way i wanted. turns out, a 10" grill was just perfect if i covered it.
i began by cutting and bending, test fitting, cutting and bending some more, test fitting some more, etc.
you can see that the door panels were cut in order to make room for the lowered/deeper woofers
so i wanted the grill to come behind the pocket, but then follow the contour of the factory opening. the front corner would not be covered due to the smaller grill size.
i was going to use grill cloth, but that would be too thin and show the edges and frame of the grill. a round hole expanded metal grill could be done to look nice and more polished (in the future maybe). i decided to use open weave carpet. having the color different is fine, i have silver accents in the interior.
i trimmed some more, fitted some more, and got the grills to secure to the door panel. then i used trusty aluminum foil tape to secure the carpet. both have some of the rubber grill edging where it would contact the vinyl.
the result was pretty much what i wanted to achieve (at 2am)


#66
09-24-2012, 03:22 PM

Senior Member Stereo Guru..Almost A Mod :)
Join Date: Feb 2011
Location: louisiana
Posts: 862
so how did the insulation work out in the doors? I really need to tear into my car and do some more deadning. If there is something that helps that I can do while I am already in there, that would be great.
#67
09-26-2012, 12:41 AM
Join Date: Dec 2009
Location: Quad Cities, IL
Posts: 3,279
night and day difference. achieved lower response in the doors with less resonance and mud. as expected, enclosures like to have absorption.
#68
10-06-2013, 12:38 AM
Join Date: Dec 2009
Location: Quad Cities, IL
Posts: 3,279
update. one year later, i've convinced dozens of people to try my insulation in the doors method and all of them saw dramatic improvements.
i've installed Hertz Mille MLK-165 components and they are the best sounding speakers i've heard in a car. just plain awesome.
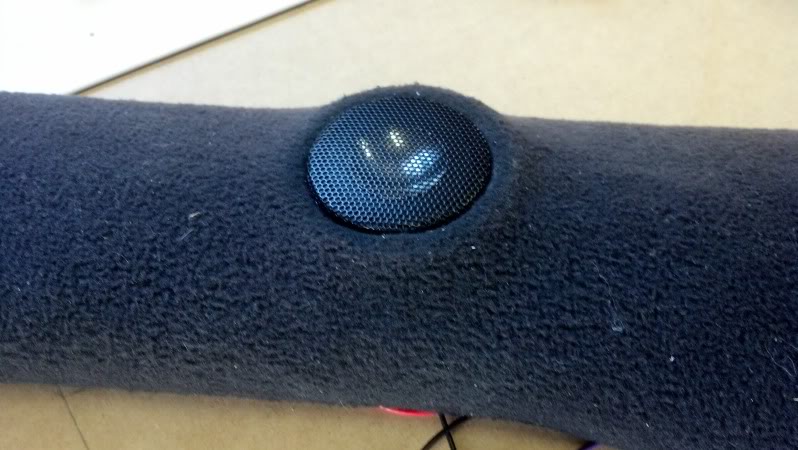
their design is fantastic. with every other speaker i've tried in the door, i measure a roll-off around 3kHz at the headrest. the Mille's have good response to 6kHz at the headrest (near woofer to near headrest). the tweeters have selectable/swappable chambers to improve response and absorb the rear wave. the result is usable response down to 2kHz. That gives me a 2kHz-6kHz window for setting crossover points - a wider window than any other speaker i've tried.
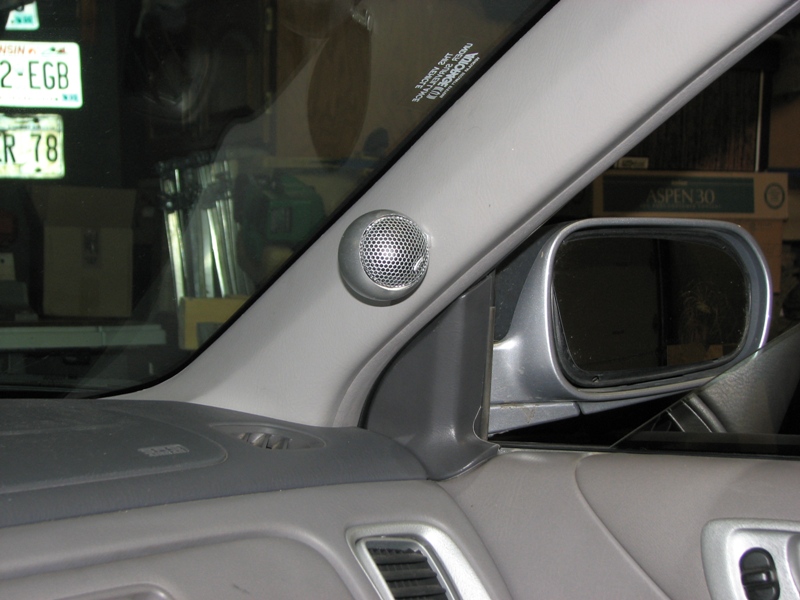
i also ran some German Maestro Status components for a while. very good speakers and the inverted dome tweeter had better off-axis response in the apillars than any other tweeter i tried, but the design prevented the use of a sphere.
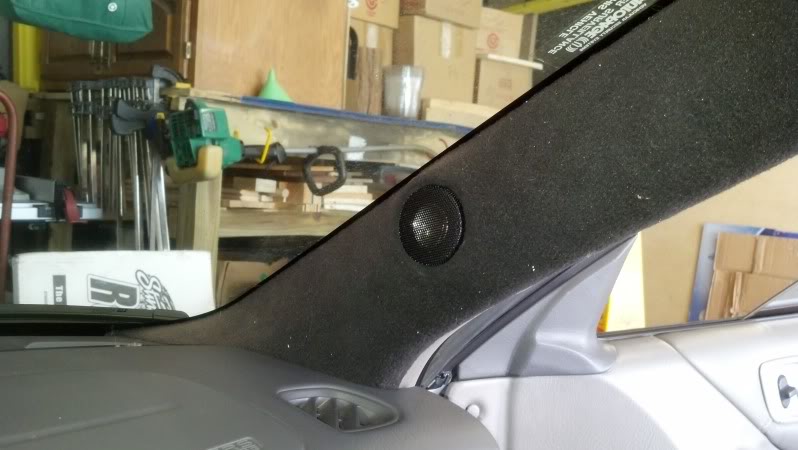
in the end, the Mille's are the best sound speakers i've ever had in the Accord. and the sound stage is remarkably better. they are unlike any other speaker i've heard.
i've installed Hertz Mille MLK-165 components and they are the best sounding speakers i've heard in a car. just plain awesome.
their design is fantastic. with every other speaker i've tried in the door, i measure a roll-off around 3kHz at the headrest. the Mille's have good response to 6kHz at the headrest (near woofer to near headrest). the tweeters have selectable/swappable chambers to improve response and absorb the rear wave. the result is usable response down to 2kHz. That gives me a 2kHz-6kHz window for setting crossover points - a wider window than any other speaker i've tried.
i also ran some German Maestro Status components for a while. very good speakers and the inverted dome tweeter had better off-axis response in the apillars than any other tweeter i tried, but the design prevented the use of a sphere.
in the end, the Mille's are the best sound speakers i've ever had in the Accord. and the sound stage is remarkably better. they are unlike any other speaker i've heard.

#70
01-26-2014, 07:48 PM
Join Date: Dec 2009
Location: Quad Cities, IL
Posts: 3,279
Found some MLV and the perfect de-coupling product at Home Depot. My local store didn't carry it but free shipping online.
dB-3 4 ft. x 8 ft. Acoustical Barrier-DB348X96BX at The Home Depot
4'x8' is enough to do a floor, $30
i got two of them to ensure rear seat and wheel wells.
but you need to decouple the product, that's where ultratouch thermal barrier comes in
UltraTouch 48 in. x 6 ft. Radiant Barrier-30000-11406 at The Home Depot
i noticed my floor gets hot from the exhaust, so this will help that as well. this would also be well suited on the roof to keep a car cooler in the summer (assuming you tint your windows and cover the windshield).
for extra fill in cavities, these bags will do the trick:
UltraTouch 16 in. x 48 in. Denim Insulation Multi-Purpose Roll-60301-16482 at The Home Depot
note that i'm not going to use CCF. CCF is fine for rattles and since it doesn't compress it is a thin decoupler, but CCF isn't absorptive.
The ultratouch blanket insulation is an excellent absorber, and will compress but will still decouple. I expect better results with this blanket than standard CCF.
to adhere the blanket to the roof i would just use spray glue, but keep the foil facing the inside. the blanket is lightweight so spray glue to tack it in place, then replace headliner. this will also improve absorption inside the car for improved acoustics.
The MLV package says .75 lb/sf but then says the 32sq. ft. package is 32 lbs. i know they make 1/2 lb/sf and 1 lb/sf. i assume it's the latter. there was a negative review where the guy sandwiched it between two layers of drywall - well no **** it didn't work, it's a limp mass barrier - the "limp" part is crucial. had that person put the MLV on the inside where it could be loose, he would have seen a marked improvement.
MLV came in. 0.75 lb/sq.ft. still cheaper than the 0.50 lb/sq.ft. i have found which was $140 for 100sq.ft. shipped.
looks decent. once i get the insulating blankets i'll lay it down. i have about 125 sq.ft. coming. i have a lot of uses for them
I got way more than I needed to do the floor. This just one of two rolls, $50 shipped for what you see.


Looks like I will be doing both my cars.
I got way more than I needed to do the floor. This just one of two rolls, $50 shipped for what you see.
Looks like I will be doing both my cars.
Rich
Acoustics Engineer[/QUOTE]
[QUOTE=keep_hope_alive;81339]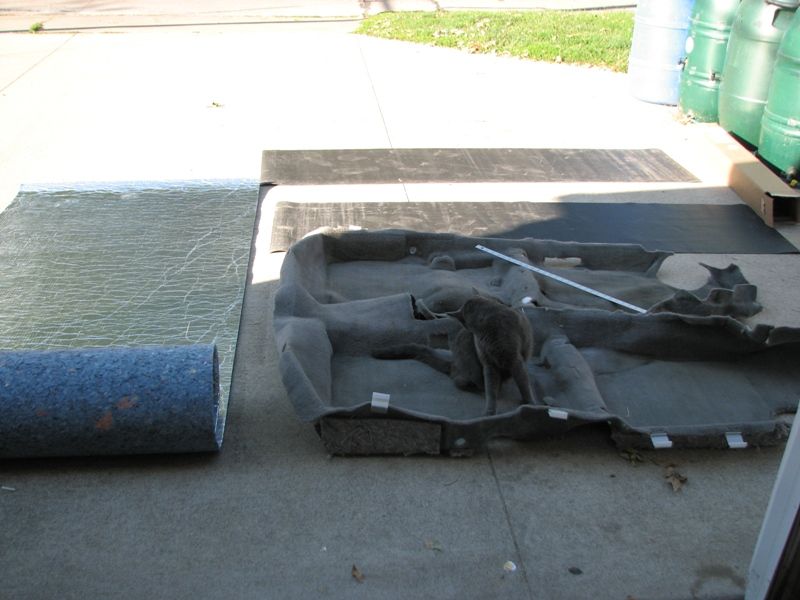
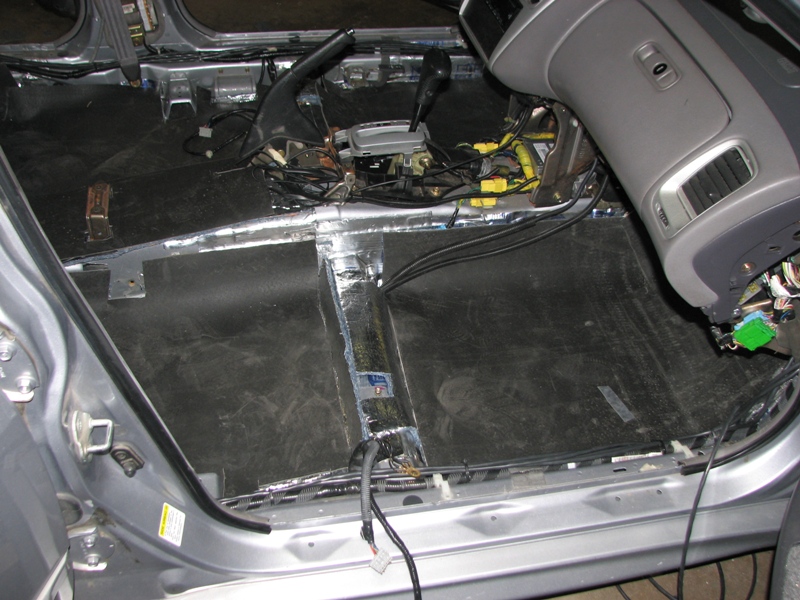
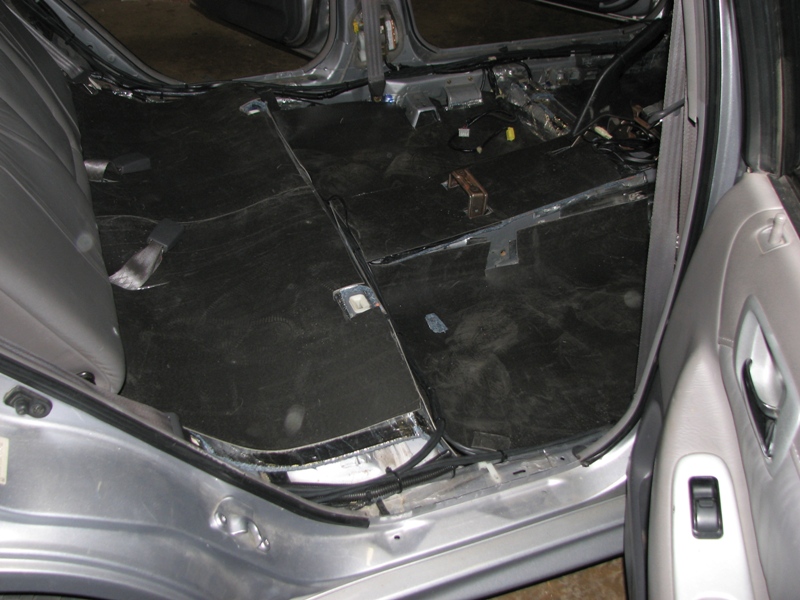
installed and a huge different was made. i'm very happy. much quieter.
dB-3 4 ft. x 8 ft. Acoustical Barrier-DB348X96BX at The Home Depot
4'x8' is enough to do a floor, $30
i got two of them to ensure rear seat and wheel wells.
but you need to decouple the product, that's where ultratouch thermal barrier comes in
UltraTouch 48 in. x 6 ft. Radiant Barrier-30000-11406 at The Home Depot
i noticed my floor gets hot from the exhaust, so this will help that as well. this would also be well suited on the roof to keep a car cooler in the summer (assuming you tint your windows and cover the windshield).
for extra fill in cavities, these bags will do the trick:
UltraTouch 16 in. x 48 in. Denim Insulation Multi-Purpose Roll-60301-16482 at The Home Depot
note that i'm not going to use CCF. CCF is fine for rattles and since it doesn't compress it is a thin decoupler, but CCF isn't absorptive.
The ultratouch blanket insulation is an excellent absorber, and will compress but will still decouple. I expect better results with this blanket than standard CCF.
to adhere the blanket to the roof i would just use spray glue, but keep the foil facing the inside. the blanket is lightweight so spray glue to tack it in place, then replace headliner. this will also improve absorption inside the car for improved acoustics.
The MLV package says .75 lb/sf but then says the 32sq. ft. package is 32 lbs. i know they make 1/2 lb/sf and 1 lb/sf. i assume it's the latter. there was a negative review where the guy sandwiched it between two layers of drywall - well no **** it didn't work, it's a limp mass barrier - the "limp" part is crucial. had that person put the MLV on the inside where it could be loose, he would have seen a marked improvement.
MLV came in. 0.75 lb/sq.ft. still cheaper than the 0.50 lb/sq.ft. i have found which was $140 for 100sq.ft. shipped.
looks decent. once i get the insulating blankets i'll lay it down. i have about 125 sq.ft. coming. i have a lot of uses for them
I got way more than I needed to do the floor. This just one of two rolls, $50 shipped for what you see.
Looks like I will be doing both my cars.
I got way more than I needed to do the floor. This just one of two rolls, $50 shipped for what you see.
Looks like I will be doing both my cars.
Rich
Acoustics Engineer[/QUOTE]
[QUOTE=keep_hope_alive;81339]
installed and a huge different was made. i'm very happy. much quieter.